
For almost two years, my 14th-floor balcony struggled — wilting money plants, crispy crotons, nothing thriving for long. Generic gardening advice never worked — until I discovered three structural problems unique to high-rise growing. Here’s exactly what I fixed, with real ratios, products, and timings that finally brought my balcony back to life.
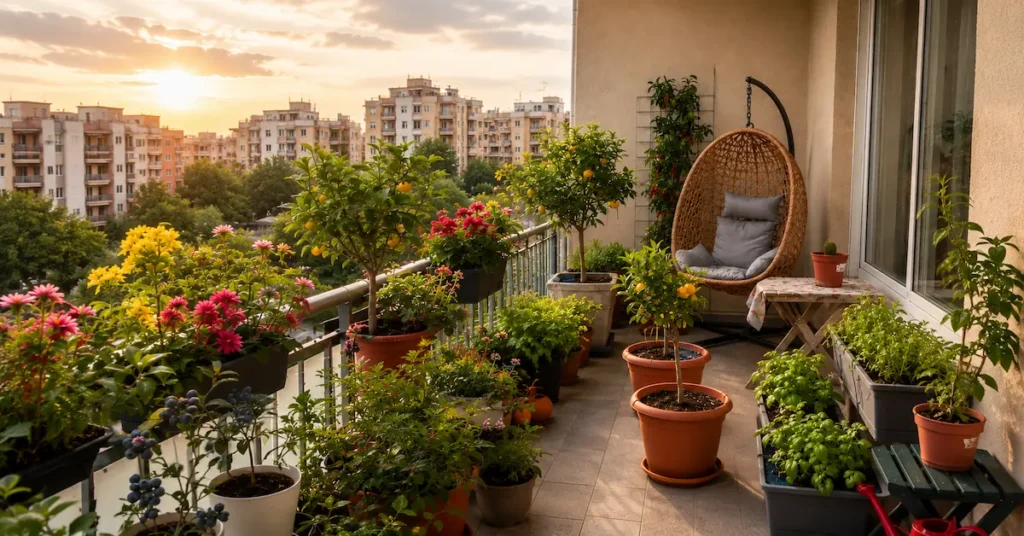
For almost two years, my high-rise balcony plants looked like a plant graveyard. I live on the 14th floor of a high-rise in a typical Indian metro setup — north-facing balcony, glass railing, concrete floor that turns into a tawa by 11 AM.
I’d buy a healthy money plant from the nursery on Saturday, and by the following Saturday, half its leaves would be yellow, curling, or just gone. Money plants, crotons, even supposedly “hardy” succulents — nothing survived more than a few weeks.
I did what most of us do. I googled “why are my plants dying,” read ten articles that all said the same five things — overwatering, underwatering, sunlight, drainage, nutrients — and tried all of them at once like a confused person throwing darts in the dark.
Nothing worked, because none of those articles were written for someone living 150 feet above ground level with no soil contact, no natural humidity buffer, and a balcony that behaves more like a furnace than a garden.
It took me an embarrassingly long time — and the loss of probably 30+ plants — to figure out that high-rise balcony gardening is a completely different game from terrace or ground-floor gardening. The advice that works for your mother’s garden in her independent house simply does not translate to a 9th floor balcony in Mumbai, Pune, Bangalore, Gurgaon, or Hyderabad.
Once I identified and fixed three specific things — not the generic “water less” advice, but three structural problems unique to high-rise growing — my balcony went from a plant graveyard to something my neighbours now stop and ask about.
In this article, I’m going to walk you through exactly what those three things were, how I diagnosed them, and the exact fixes I used. This isn’t a theory. This is what actually worked, with the brands, quantities, and timings I use even today.
Why High-Rise Balconies Are a Different Beast Altogether
Before I get into the fixes, you need to understand why your balcony is fighting you. Most gardening advice — even from Indian YouTube channels — assumes you have:
- Access to natural soil or at least ground-level humidity
- Some tree cover or building shade nearby
- A floor that doesn’t radiate heat back into the pot
- Decent wind buffering from surrounding structures
A high-rise balcony, especially anything above the 6th floor, has none of these. You’re dealing with concentrated heat reflection off concrete and glass, wind speeds that are 2-3 times stronger than ground level, and zero ambient humidity because you’re floating above the tree line. I learned this the hard way, but once I understood it, the fixes became obvious.
Problem 1: I Was Using the Wrong Potting Mix — And It Was Cooking My Roots
How I figured this out
The first thing I noticed was that my plants weren’t just wilting — they were wilting fast, sometimes within hours of being watered. I’d water in the morning, and by 3 PM, the same plant would be drooping like I’d never touched it.
My first assumption was underwatering, so I started watering twice a day. That made things worse. Leaves started turning mushy and yellow at the base, which is actually a root rot symptom, not a dryness symptom — but because the topsoil dried so fast, I kept misreading the signal.
It took a frustrating conversation with a nursery owner near Lokhandwala (Mumbai) for me to realize my mistake. I was using regular garden soil — the same red or black soil sold loose in nurseries — straight in my pots. That soil is fine for ground-level gardens where there’s natural moisture regulation from the earth below. On a 14th floor balcony with direct concrete heat, that same soil compacts, holds water unevenly, and cooks from the bottom because the pot itself becomes a heat trap sitting on the floor.
The actual fix
I switched my entire potting mix to a formula specifically suited for high-rise, container-only growing. Here’s the exact ratio I use now for almost every plant on my balcony:
My High-Rise Potting Mix Ratio:
- 40% cocopeat (washed and buffered, not raw)
- 30% perlite or pumice
- 20% well-rotted vermicompost
- 10% normal garden soil (just for microbial life, not structure)
This mix drains fast, doesn’t compact, and most importantly, doesn’t trap heat the way dense soil does. Cocopeat alone made a massive difference because it holds moisture without becoming waterlogged, and perlite keeps air pockets open so roots can actually breathe even when the pot surface is hot to touch.
I buy cocopeat blocks from a local nursery — a 5kg compressed brick costs around ₹150-200 and expands to fill almost 3-4 medium pots once soaked. Perlite is slightly harder to find locally but is easily available on Amazon India or from succulent/cactus specialty sellers, usually ₹250-300 for a kg, which lasts a very long time since you only need small quantities per pot.
Why this specifically matters for high-rise growing
Ground-floor gardens have what I call “soil memory” — the earth below holds a baseline moisture and temperature that buffers your pots even when it’s hot outside. Your balcony pot has no such buffer.
It’s an isolated island sitting on hot concrete with direct sun and wind hitting it from multiple angles. The potting mix has to do all the work that the earth would normally do for you. This single change reduced my plant deaths by what I’d estimate was 60% on its own.
Quick checklist for fixing your potting mix
- Stop using raw garden soil alone in pots — it’s not designed for isolated container life
- Mix in cocopeat for moisture retention without waterlogging
- Add perlite or pumice for drainage and root aeration
- Always buffer raw cocopeat (soak and rinse 2-3 times before using — raw cocopeat has high salt content that can burn roots)
- Repot stressed plants gradually — don’t shock the roots by changing 100% of the medium in one go; do it over 2 sittings, a week apart
Note on Nursery Soil Transitions: Root shock after repotting isn’t only about your new soil mix — it’s also about what the plant came packed in. Most nurseries use cheap, highly acidic peat moss for transport. Dump that root ball straight into the container soil without prepping it, and the core goes hydrophobic, blocks water, and starves the roots. For a step-by-step breakdown on handling this hidden trap, check out my deep-dive on Why Nursery Plants are Packed in Peat Moss (And How to Repot Safely).
Problem 2: I Was Watering on a Schedule, Not Watching the Plant
How I figured this out
This was my biggest mistake, and I think it’s the most common mistake among new Indian balcony gardeners. I had read somewhere that you should water plants “every alternate day” or “twice a week,” so I followed that rule religiously, regardless of season, regardless of plant type, regardless of weather.
The problem is that a high-rise balcony’s drying rate changes dramatically based on wind, sun direction, and even the time of year — far more dramatically than it would for a ground-level garden.
In April-May, with my west-facing exposure catching brutal afternoon sun, my pots were bone dry within 24 hours. But during monsoon months, with humidity in the air and overcast skies, the same pots stayed wet for 4-5 days.
I was watering my plants on the same fixed schedule throughout the year, which meant I was drowning them in the monsoon season and starving them in summer.
The real giveaway came when I started actually inspecting the soil before watering instead of just following the calendar. I’d push my finger about 2 inches into the pot, and during what I thought was a “watering day” in July, the soil was still damp from 3 days ago.
I had been overwatering for months without realizing it because rotting roots and underwatered, crispy roots can sometimes show similar-looking symptoms above soil — drooping leaves, yellowing — and I was misreading both as “needs more water.”
The actual fix
I completely abandoned the fixed schedule and switched to what I now call the “finger and pot-weight test,” which takes 10 seconds per plant and has been almost foolproof since I started using it.
My Watering Decision Method:
- Finger test: Push your index finger 2 inches into the soil. If it comes out with moist soil sticking to it, skip watering. If it comes out clean and dry, water.
- Pot lift test (for smaller pots): Lift the pot. A well-watered pot feels noticeably heavier than a dry one. After doing this for a few weeks, you develop an instinct for the weight difference.
- Leaf droop timing: For plants like money plant or peace lily, slight droop in the late afternoon during peak summer is actually normal — the plant is conserving moisture. Don’t panic-water based on this alone; check again early next morning. If it hasn’t recovered overnight, that’s your real signal.

I also started grouping my plants by water needs instead of watering everything together. Succulents and cacti went on one side getting watered roughly once every 10-12 days. Moisture-loving plants like peace lily, calathea, and ferns went on the shadier end of the balcony and got checked every 2 days.
This single act of separating plants by thirst level, instead of treating my balcony as one watering zone, fixed almost all my remaining plant losses.
Seasonal watering guide I now follow (North Indian high-rise context)
| Season | Approx. Frequency for Most Foliage Plants | Notes |
| Summer (April-June) | Every 1-2 days | Early morning watering only, never midday |
| Monsoon (July-Sept) | Every 4-6 days, finger-test always | Watch for fungal issues, ensure drainage holes aren’t blocked |
| Post-monsoon (Oct-Nov) | Every 3-4 days | Transition period, reduce gradually |
| Winter (Dec-Feb) | Every 6-8 days | Plants slow down growth, overwatering here kills more plants than underwatering |
| Spring (Mar) | Every 2-3 days | Watch for new growth spurts, slightly increase as heat returns |
These numbers will shift slightly depending on whether you’re in Delhi’s dry heat, Mumbai’s humid coastal air, or Bangalore’s moderate climate — but the finger test stays universal regardless of your city.
Checklist for fixing your watering routine
- Stop watering on a fixed calendar schedule
- Do the 2-inch finger test before every watering session
- Group plants by water requirement instead of watering uniformly
- Always water early morning (before 9 AM) or after 6 PM, never in direct midday heat
- Check drainage holes monthly — compacted soil or root growth can silently block them
- Reduce watering frequency by roughly 40-50% once winter sets in
Problem 3: My Balcony’s Microclimate Was Working Against Every Plant I Chose
How I figured this out
This was the most humbling realization, because it meant the first 8-9 months of my failures weren’t really about watering or soil at all — they were about choosing the wrong plants for my specific balcony conditions in the first place.
I kept buying whatever looked nice at the nursery without understanding that my balcony had its own unique microclimate that didn’t match what those plants needed.
My balcony faces west, gets blasted with direct sun from around 1 PM to 5 PM, sits 14 floors up where wind speed is noticeably stronger than street level, and has a glass railing that traps and reflects heat back onto the plants closest to it.
The Invisible Heat Trap: Watch out for your AC outdoor unit — that constant blast of hot, dry exhaust will flash-fry potting mix and kill delicate foliage fast. Learn how to shield your containers in my guide on Why Balcony Vegetable Plants Struggle Near AC Outdoor Units (And How to Protect Them).
None of this matches the “bright indirect light” condition that most popular houseplants (money plant, pothos, peace lily) are suited for. I was essentially trying to grow shade-loving, humidity-craving plants in what was functionally a rooftop desert for four hours every afternoon.
The wind factor surprised me the most. Nobody talks about this enough in Indian gardening content. Above the 8th-10th floor in most cities, wind speed increases significantly compared to ground level, and this constant air movement dries out leaves and soil far faster than equivalent ground-floor exposure.
My peace lily, which thrives easily in ground-floor balconies, was constantly crispy at the leaf tips no matter how much I watered it — because the wind was wicking moisture out of the leaves faster than the roots could replace it.
The actual fix
I did two things: I mapped my balcony’s actual microclimate zones, and then I chose plants that matched those zones instead of fighting against them.
Step 1 — Mapping the balcony. I spent one full day just observing — where the sun hit at 9 AM, 12 PM, 3 PM, and 5 PM, which corners stayed shaded by the building’s own overhang, and where wind hit hardest (usually the open edge near the railing).
I made a rough sketch dividing my small balcony into three zones: a “harsh sun and wind” zone near the railing edge, a “moderate filtered light” zone in the middle, and a “low light, wind-protected” zone closest to the door, shaded by the upper floor’s overhang.
Step 2 — Matching plants to zones, not the other way round.
For the harsh sun and wind zone, I moved in:
- Bougainvillea (genuinely thrives on neglect and harsh light)
- Aloe vera and other succulents
- Adenium (desert rose) — does brilliantly in reflected heat
- Vinca (sadabahar) — extremely tolerant of wind and heat
For the moderate filtered light zone:
- Money plant (finally stopped dying once it wasn’t in direct afternoon blast)
- Croton (loves bright light but not scorching direct exposure all day)
- Hibiscus, which flowered for the first time once it got morning sun but afternoon relief
For the low light, wind-protected zone:
- Peace lily — finally stopped browning at the tips
- Ferns and calathea, which need still air and humidity
- ZZ plant and snake plant for near-zero maintenance
Step 3 — Building a wind buffer. For the harsh zone, I also installed a simple jute or coir netting along the railing, just covering the bottom third where wind hits hardest at soil level. This single addition reduced soil drying speed noticeably and protected lower leaves from constant whipping, without blocking the view or breaking any society rules about balcony grilles.
Why this matters more than people realize
Most gardening content treats “sunlight requirement” as a single static label — full sun, partial shade, full shade — without accounting for the fact that high-rise reflected heat and wind exposure change how that label applies.
A plant labelled “partial shade” in a ground-floor context might need to go in your harshest zone if your balcony’s “partial shade” is still hotter and windier than a ground floor’s “full sun” due to concrete and glass reflection. You have to observe your own balcony like a unique ecosystem, not follow a generic plant tag.
Checklist for matching plants to your balcony’s microclimate
- Spend one full day observing sun movement across your balcony at 4-5 different times
- Identify your harshest zone (usually nearest the railing edge) and your most protected zone (usually nearest the door/wall)
- Choose hardy, sun-and-wind-tolerant plants (bougainvillea, adenium, vinca, succulents) for the harshest zone
- Reserve moisture-loving, delicate-leaved plants (ferns, calathea, peace lily) for your most protected zone
- Add a simple jute/coir wind buffer along open railings if you’re above the 8th floor
- Re-observe your zones every 3-4 months — sun angles shift significantly between summer and winter
The Pest Problem Nobody Warns High-Rise Gardeners About
Once my plants started actually surviving, I ran into a new problem I genuinely hadn’t expected — pest infestations that seemed to appear out of nowhere, despite being 14 floors above any garden, park, or soil patch.
I assumed height would naturally protect me from pests the way it protects me from, say, stray cats wandering onto my balcony. I was wrong, and understanding why changed how I manage my plants even today.
How pests actually reach a high-rise balcony
Mealybugs, aphids, and spider mites don’t need to crawl up 14 floors. They arrive in three main ways that I’ve personally traced back over time:
- New plants from the nursery. This was the source of almost 80% of my infestations. Nurseries are dense with plants, and pests move between them easily. I now quarantine every new plant on a separate corner of my balcony for at least 10-12 days before placing it near my existing collection, and I inspect the undersides of leaves and the soil surface with a torch before bringing anything new in at all.
- Wind-borne eggs and larvae. Certain pests, especially whiteflies and some aphid species, can be carried significant distances by wind currents, and high-rise buildings catch more sustained wind than ground level. This was a hard one to control directly, but keeping plants healthy and strong (which makes them naturally more pest-resistant) became my main defence here.
- Contaminated potting mix or compost. I once brought home a bag of vermicompost that turned out to be carrying mealybug eggs, and within two weeks, it had spread to four different pots. I now always check compost for any white, cottony residue before using it, and I avoid buying loose, unbranded compost from roadside vendors.
The specific pests I deal with most, and how I treat them
Mealybugs — These show up as small white, cottony clusters, usually in leaf joints and the undersides of leaves. They love high-rise heat and thrive in the same warm, slightly humid pockets that develop near glass railings. My treatment: I dab them directly with a cotton swab dipped in diluted neem oil (about 5ml neem oil mixed with a few drops of liquid soap in 1 litre of water), repeated every 4-5 days for two weeks. For serious infestations, isopropyl alcohol on a cotton swab kills them on contact, but I use this carefully and only on hardy plants, never on delicate-leaved ones like ferns.
Spider mites — These are almost invisible to the naked eye but leave a telltale fine webbing and tiny speckled discoloration on leaves, usually starting with yellow-ish stippling. They thrive specifically in dry, hot, low-humidity conditions, which made my west-facing harsh zone a perfect breeding ground. The fix that worked best for me was increasing humidity locally — I started misting affected plants in the early morning and grouping them slightly closer together so they create a shared micro-humidity pocket, combined with the same diluted neem oil spray applied weekly.
Aphids — Small, soft-bodied insects, usually green or black, clustering on new growth and flower buds. A strong jet of water from a spray bottle, done early morning, physically dislodges most of them. For persistent cases, the same neem oil solution works, and I’ve also had success introducing a few marigold plants nearby, since aphids seem to prefer marigolds over my other plants, acting almost like a sacrificial trap crop.
Fungal issues during monsoon — This isn’t a pest but deserves mention because it caused real damage before I understood it. During monsoon months, the combination of high humidity and my dense potting mix created perfect conditions for fungal growth, especially on plants like peace lily and calathea.
I noticed dark, soft patches at the base of stems and a faint musty smell from the soil. The fix was twofold: I raised every pot slightly off the floor using small pot feet or bricks to improve airflow underneath, and I cut back watering frequency significantly during the wettest weeks, relying more on humidity from the air than direct soil watering during that period.
My current pest-prevention checklist
- Quarantine every new plant for 10-12 days before placing it with existing plants
- Inspect leaf undersides and stem joints weekly with a torch, especially in warm months
- Keep a small bottle of diluted neem oil solution ready at all times (5ml neem oil + few drops liquid soap + 1 litre water)
- Raise pots slightly off the floor to improve airflow and reduce fungal risk during monsoon
- Avoid loose, unbranded compost from unreliable sources
- Plant a few marigolds as a natural pest trap near vulnerable plants
A City-Wise Quick Reference for Indian High-Rise Balconies
Because India’s climate varies so dramatically from city to city, I’ve put together a rough adjustment guide based on conversations with fellow balcony gardeners in different cities, layered on top of my own Mumbai-based experience. Use this as a starting adjustment, then fine-tune using the finger-test method described earlier.
Mumbai and coastal cities (Chennai, Kochi, Mangalore) Humidity is your advantage here, but salt-laden air near the coast can affect plants on balconies facing directly toward the sea. Rinse leaves gently with plain water every couple of weeks if you’re close to the coastline, and lean toward plants that tolerate humidity well, like ferns, calathea, and most tropical foliage plants.
Delhi, Gurgaon, and North Indian plains cities Extreme dry heat in summer and genuinely cold winters mean your plant choices need to handle both ends. Adeniums and bougainvillea handle summer beautifully but need to be moved to a more sheltered spot or covered lightly during cold winter nights when temperatures drop sharply. Watering frequency swings more dramatically between seasons here than almost anywhere else in India.
Bangalore and Pune Genuinely the most forgiving climates for high-rise balcony gardening in India, with moderate temperatures most of the year. Almost any plant on this list will do reasonably well here with standard care, though Bangalore’s occasional cold snaps in December-January can still stress tropical plants if left unprotected.
Hyderabad and Deccan plateau cities Similar to Delhi in terms of dry heat intensity during summer, but without the extreme winter cold. Focus heavily on the wind-buffer and microclimate-zoning advice here, as I’ve heard from gardeners in this region that wind exposure at height is particularly noticeable.
This isn’t a substitute for observing your own specific balcony, but it gives you a reasonable starting point if you’re setting up your space for the first time.
Tools and Supplies I Actually Use (Not a Sponsored List, Just What’s in My Balcony Right Now)
I get asked fairly often what specific products I use, so here’s an honest rundown, with no brand sponsorships involved:
- Cocopeat blocks — generic compressed bricks from my local nursery, soaked and rinsed before use
- Perlite — ordered online since it’s not commonly stocked in regular nurseries
- Vermicompost — sourced from a small local vermicompost producer rather than mass-market packaged brands, though packaged vermicompost works fine too
- Neem oil — cold-pressed, unrefined neem oil, diluted fresh each time rather than pre-mixed and stored
- Jute/coir netting — bought as a roll from a local hardware shop, cut to size for my railing
- A basic moisture-checking finger and a torch — genuinely the two tools I rely on most
- Terracotta and plastic pots, mixed — terracotta for plants in my harsh sun zone since it breathes better and prevents overheating compared to plastic, plastic for my shaded zone where moisture retention matters more
None of this is expensive or hard to source, which is honestly part of why I’m sharing it. The fixes that worked for me weren’t about buying more things — they were about understanding my specific space better and matching simple, accessible solutions to it.
Bringing It All Together: My Current Balcony Care Routine
Once these three fixes were in place, maintaining the balcony stopped feeling like a constant battle and became genuinely enjoyable — which, looking back, is the whole point of having a garden in the first place. Here’s what my actual weekly routine looks like now.
Every morning (5 minutes):
- Quick visual scan for drooping or discoloured leaves
- Finger test on 2-3 random pots to gauge overall moisture trend
- Water only the pots that fail the finger test
Once a week:
- Rotate pots slightly if I notice uneven growth toward the light
- Check for pests, especially on the undersides of leaves (mealybugs and spider mites love high-rise heat)
- Top up mulch (I use dry coconut husk pieces) on any pot showing exposed, dry topsoil
Once a month:
- Feed with diluted vermicompost tea or a balanced liquid fertilizer — I personally use a fish amino acid solution diluted heavily, applied to moist soil only, never dry soil
- Check drainage holes for blockage
- Trim any dead or yellowing growth to redirect the plant’s energy
Seasonally:
- Re-pot any plant that’s been rootbound for over a year, ideally just before monsoon or just after summer
- Reassess plant placement as sun angles shift between seasons
- Switch fertilizer ratios — more nitrogen-focused feed in growth months (spring/monsoon), more potassium-focused in pre-winter to harden plants against cold stress
A Note on Patience, Because Nobody Tells You This Part
I want to be honest about something most gardening articles skip over. Even after fixing all three of these things, I didn’t see my balcony transform overnight.
It took roughly two full seasons — about 5-6 months — before I started seeing consistent, healthy growth across most of my plants. Some plants that I thought were completely dead, particularly a croton I’d almost thrown out, actually bounced back from the roots once the potting mix and watering routine were corrected, even though I’d written it off as a lost cause.
If you’re trying these fixes and not seeing instant results, that doesn’t mean they’re not working. Plants that have been stressed for months need time to rebuild their root systems before you’ll see visible above-soil recovery.
Give each change at least 4-6 weeks before judging whether it’s working, and resist the urge to keep changing variables every few days — that kind of constant tinkering was actually part of my original problem.
Final Thoughts
Looking back at those two years of dead and dying plants, almost every failure traced back to one of these three root causes — wrong potting medium, rigid watering schedule instead of responsive watering, and ignoring my balcony’s specific microclimate.
None of these fixes required expensive equipment or rare products. They required observation, a willingness to question generic advice, and patience to let the changes actually work over weeks rather than days.
If your high-rise balcony plants keep dying despite your best efforts, I’d genuinely encourage you to pause before buying another replacement plant. Spend a week just observing your space — where the sun actually falls, how fast your soil actually dries, how strong the wind actually feels at different times of day.
That observation will tell you more than any generic gardening checklist ever could, including this one. Once you understand your own balcony’s personality, choosing and caring for plants stops being guesswork and starts being genuinely rewarding.
If you try any of these fixes — the potting mix ratio, the finger-test watering method, or the microclimate zoning — I’d love to know how it works out on your own balcony. Every high-rise balcony is a little different, and honestly, that’s part of what makes this kind of gardening interesting once you stop fighting it and start working with it.