For most of my first year of balcony gardening, I was making the same mistake most apartment gardeners make: I had a plastic bin, I was throwing in whatever came out of the kitchen, and I was hoping for the best. What I got instead was a swampy, foul-smelling mess that sat on my balcony and embarrassed me every time a neighbor walked past.
The problem wasn’t composting itself. It was that I was doing cold, passive composting — essentially just rotting food in an enclosed container — rather than the hot, aerobic process that actually produces finished compost in three weeks.
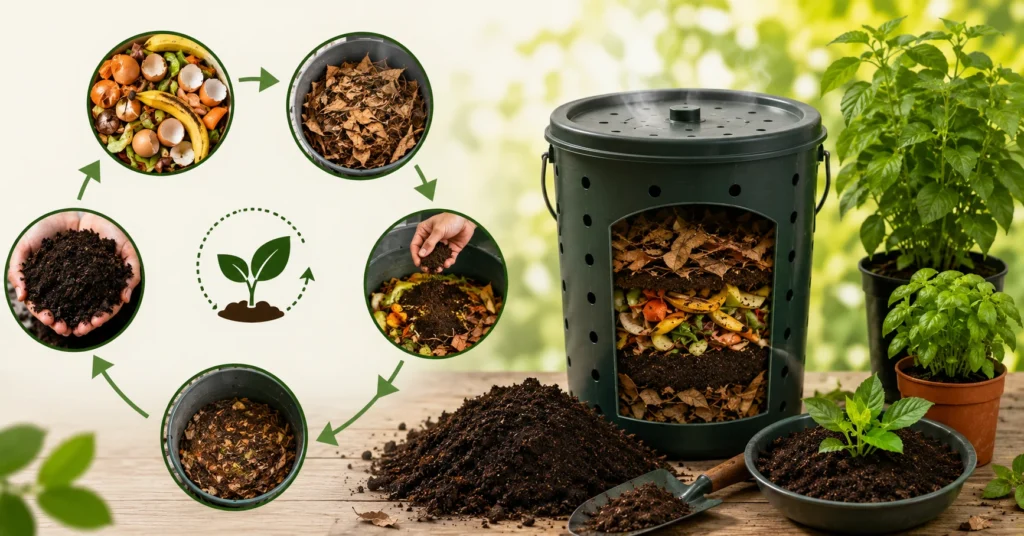
Once I switched to active hot composting with the right carbon-to-nitrogen balance, everything changed. The smell disappeared. The pile heated up visibly. And 20 days after building my first proper batch, I harvested a tray of dark, crumbly compost that my coriander plants absolutely loved.
Here’s exactly what I did — and the science behind why it works.
What You Need Before Day 1
You don’t need expensive equipment. What you do need is everything assembled before you start, because 20-day composting is a batch process — you cannot keep adding material mid-cycle.
| Item | Purpose | Sourcing Notes |
| Wooden crate or 40L+ plastic bin | Compost container | Old vegetable crates, hardware stores. Wooden bins drain better. |
| Garden fork or thick stick | Turning and aerating | Any nursery or hardware store. |
| Small covered kitchen bucket | Collect daily scraps | Any steel or plastic container with a lid. |
| Dry cardboard | Brown material | Amazon boxes, grocery store cardboard (torn into palm-sized pieces). |
| Dry leaves or straw | Additional brown material | Collect from parks, local nurseries. |
| Drill (for plastic bins) | Create drainage holes | Borrow from a neighbor if needed. |
If you’re using a plastic bin, drill 8–10 holes in the base and 6–8 along each side. A sealed bin is the single most common reason apartment compost fails — the pile goes anaerobic within days, and you get that sulfurous, rotten-egg smell that’s almost impossible to recover from quickly.
Balcony Tip: For Indian balconies where waterlogging is a monsoon problem, place the bin on two bricks to raise it off the floor and let drainage run freely.
The Science You Need to Understand: Carbon-to-Nitrogen Ratio
Every person who’s ever had a smelly compost bin had the same root problem: too much nitrogen relative to carbon.
Compost is made by bacteria. Those bacteria need carbon as their energy source and nitrogen for protein synthesis and reproduction. The ratio they work best at — confirmed by research from Cornell University’s Waste Management Institute — is 25 to 30 parts carbon for every 1 part nitrogen.
- Below 20:1 (Too much nitrogen): Excess nitrogen escapes as ammonia gas. That’s where the bad smell comes from.
- Above 35:1 (Too much carbon): The bacteria don’t have enough protein to reproduce, and the pile stays cold and inert for months.
The rule of thumb that actually works: 3 parts dry brown material by volume for every 1 part green kitchen waste. You don’t need a calculator — just add three times as much torn cardboard and dry leaves as you add kitchen scraps, and you’ll land in the right zone every time.
The C:N Sweet Spot: The sweet spot between carbon-rich browns and nitrogen-rich greens sits at 25-30:1. Below it, your pile smells. Above it, nothing happens.
What Kitchen Waste to Add — And How Much
Not all kitchen waste composts at the same rate. Knowing which materials are carbon-heavy (“browns”) versus nitrogen-heavy (“greens”) lets you build a balanced pile intentionally.
| Kitchen Waste | Category | Approx. C:N Ratio | Notes |
| Vegetable scraps | Green | 12–20:1 | Add freely — the core of any compost pile (peels, tops, roots). |
| Fruit peels | Green | 20–35:1 | Add freely; citrus in moderation (mildly antibacterial). |
| Coffee grounds | Green | 20:1 | Excellent — also improves pile drainage. |
| Tea leaves | Green | 15–20:1 | Loose or from bags; remove staples from tea bags first. |
| Cooked plain rice or roti | Green | 15:1 | Use sparingly — attracts flies if the pile is wet. |
| Eggshells | Neutral | ~35:1 | Crush before adding; add calcium but break down slowly. |
| Onion/garlic skins | Green | 12–15:1 | Fine in small amounts; large quantities slow decomposition. |
| Dry cardboard | Brown | 400–560:1 | The most important brown material — add generously (torn, not shredded). |
| Dry autumn leaves | Brown | 50–80:1 | Ideal bulk brown; crush or cut into smaller pieces. |
| Newspaper / paper bags | Brown | 175:1 | Tear and wet slightly before adding; avoid glossy paper. |
| Straw | Brown | 75–85:1 | Good for structure; easy to source from nurseries. |
One thing I learned the hard way: never add large quantities of onion skins at once. They’re not harmful, but in bulk, they release compounds that slow bacterial activity. A handful mixed into the pile is perfectly fine.
The 20-Day Composting Plan
The Berkeley 18-day method, developed at UC Berkeley, is the foundation for this process. The key insight is that frequent turning — not waiting — is what makes composting fast.
Build your pile all at once on Day 1. Alternate layers of green kitchen waste (about 5–7 cm thick) with layers of dry brown material (10–15 cm thick). Moisten each layer as you build — the pile should feel like a wrung-out sponge, not dripping wet.
| Day | Action | Center Temperature | What to Watch For |
| 1 | Build the full pile. Layer greens and browns (3:1 brown:green). Moisten as you layer. | Ambient (25–30°C) | Do not add more material after today. |
| 2–3 | Check moisture. Look for steam rising from the pile — that means it’s working. | Rising to 43–50°C | Add dry cardboard strips if the pile feels wet or smells. |
| 4 | First turn. Move exterior material to the center, and center to the outside. | Peak 55–65°C | The most critical step — skipping this is why most piles fail. |
| 5–6 | Monitor. The pile holds heat if turned correctly. | 55–65°C | Moisture check — squeeze test should show 1–2 drops, not a stream. |
| 7 | Second turn if the temperature starts dropping. | 50–60°C | Add a cup of water if the pile feels dry during turning. |
| 8–9 | Pile volume noticeably shrinks. Materials darken. | 45–55°C | This is normal — fast decomposition is consuming mass. |
| 10 | Third turn. | 45–55°C | Break up any compacted sections or dry patches. |
| 11–13 | Resting phase. Monitor smell (should be earthy, not ammonia). | 35–45°C | If an ammonia smell appears, add more cardboard immediately. |
| 14 | Fourth turn (final active turn). | 30–40°C | Material should look crumblier and significantly darker. |
| 15–17 | Cool-down. Thermophilic bacteria finish their work. | 25–35°C | No action needed. |
| 18–20 | Final check. | Near ambient | Ready if dark brown, earthy, crumbly, and 1/3 original volume. Allow 4 more days to cure if not. |
The Temperature Curve: Think of the temperature curve as your composting progress bar. A lack of heat between days 4–7 means something is off — usually that the pile is too dry, too small, or contains too much carbon.
How to Turn the Pile Correctly
Turning isn’t just mixing — it’s redistributing. The outside of your pile is always cooler and less decomposed than the center. A proper turn moves that cooler material into the hot center, which exposes it to active bacteria and reignites the thermal reaction.
Step-by-Step Turning:
- Pull the outer layer (cooler, less decomposed) off to the side first.
- Scoop the center material (hottest, darkest) to the bottom of your container.
- Layer the outer material back on top.
- If the pile feels dry during turning, add water in a thin stream — aim for that wrung-sponge consistency throughout.
In a small balcony bin, this is easier than it sounds. I use a long stick to thoroughly mix and aerate if a full “inside-out” turn isn’t possible in the container. The goal is breaking up any anaerobic pockets and getting fresh oxygen into every part of the pile.
According to the EPA’s composting guidelines, piles turned every 4–7 days finish in 4–6 weeks, while piles turned less than monthly take 6–12 months. The difference is entirely down to oxygen.
Why Hot Composting Stays Odor-Free
The smell most people associate with compost is the smell of anaerobic decomposition — the same chemistry happening in a landfill. Aerobic composting (with adequate oxygen and balanced ratios) produces carbon dioxide and water, not methane, hydrogen sulfide, or ammonia.
Three variables maintain perfect aerobic conditions:
- Ratio: 3 parts brown to 1 part green. This is non-negotiable. As an experienced grower from the r/composting community puts it:
“Every time you add a bin of kitchen scraps, add 4x as much brown and give it a mix. You won’t smell anything and the composting will accelerate…” - Turn every 4–7 days: Turning reintroduces oxygen. Without it, compacted wet material goes anaerobic within 48 hours, especially in summer heat where decomposition runs incredibly fast.
- The Squeeze Test: Grab a handful of material from the center and squeeze it firmly. It should feel damp and release no more than one or two drops of water. If water streams out, add dry cardboard and turn immediately. If it crumbles into dry dust, add a little water.
Pro Tip: Always cover fresh kitchen waste with a layer of browns immediately after adding it. The dry cardboard acts as a physical barrier that prevents fruit flies from accessing the wet material and stops an anaerobic surface layer from forming.
Signs Your Compost is Ready
At day 20, check for all five of these indicators before declaring your batch finished:
- Color: Rich, uniform dark brown throughout — not patchy or light-colored in the center.
- Smell: Earthy and pleasant — the distinct smell of a forest floor after rain. Not sour, not like ammonia, and not musty.
- Texture: Crumbles apart easily in your hand. Neither sticky and wet, nor powdery and dry.
- Volume: Reduced to roughly one-third of the original pile size. This reduction is one of your most reliable indicators.
- Recognizability: No visible vegetable scraps, fruit peels, or food pieces. If you can still identify what went in, it’s not done.
If small pieces of eggshell or a few stubborn cardboard strips are still visible but everything else looks ready, screen the pile through a simple wire mesh (6mm hardware cloth works well) and toss the coarser material right back into your next batch.
Troubleshooting: What Went Wrong and How to Fix It
| Problem | Likely Cause | Fix |
| Pile smells like ammonia | Too many greens, not enough browns | Add 5–10 cm of dry torn cardboard, turn immediately. |
| Pile smells rotten/sulfurous | Anaerobic — pile is too wet or not turned | Turn thoroughly, add dry browns, and check drainage holes. |
| Pile stays cold and inactive | Too dry, too much carbon, or pile too small | Add water + a handful of nitrogen-rich greens; ensure pile volume is at least 40L. |
| Flies and insects | Uncovered wet kitchen scraps on the surface | Always bury scraps under 5 cm of brown material after adding. |
| Pile doesn’t heat past 40°C | Not enough nitrogen, or pile is too small | Add coffee grounds or grass clippings; ensure the pile is at least 40L. |
| Recognizable scraps at Day 20 | Pieces were too large or too carbon-heavy | Allow 4–7 more days to cure; chop materials smaller next batch. |
Using Your Finished Compost in Container Gardens
Dark, crumbly, finished compost is one of the best things you can add to balcony container soil. For most container plants, a 20–30% compost mix (about 1 part compost to 3–4 parts soil) improves drainage, boosts microbial life, and feeds plants slowly over 2–3 months.
- For heavy feeders (Tomatoes, Brinjal, Chillies): Mix compost directly into the top 5 cm of container soil at planting time, and topdress with a thin 1–2 cm layer monthly.
- For leafy greens (Coriander, Spinach): A single compost mix at potting time usually provides enough nutrition for the full growth cycle.
One Final Note: Fresh compost applied straight from a 20-day batch will continue curing in your container. While that is perfectly fine for established plants, you should wait another 2–3 weeks to cure before using it on delicate seedlings, as the residual nitrogen compounds in very fresh compost can burn young, tender roots.