
Kitchen counter hydroponics looks effortless online — until your plants mysteriously die within two weeks. Is it the nutrients? The light? (Hint: usually neither.) Here’s what was actually killing mine in an Indian apartment, and the five simple, tested fixes that finally made it work.
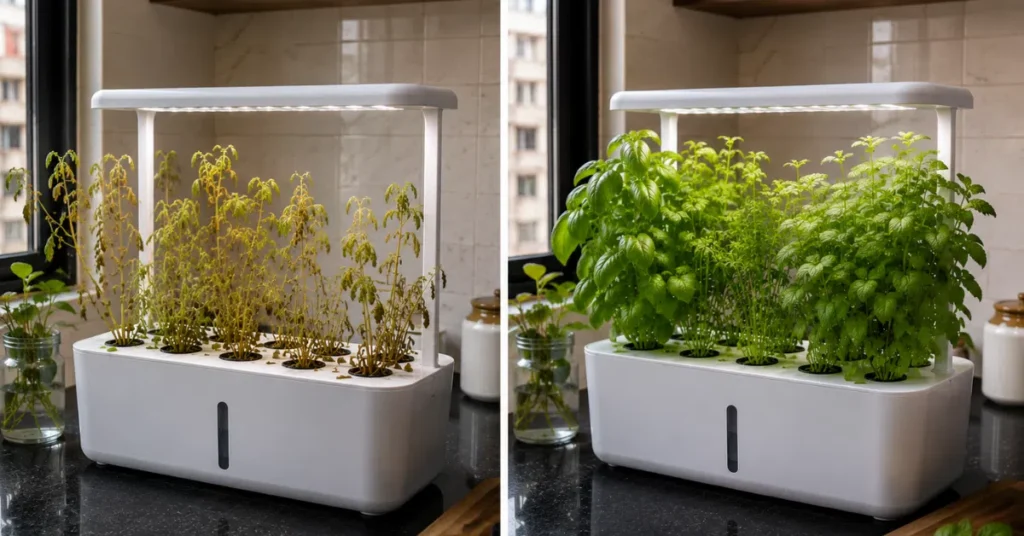
My first kitchen counter hydroponics setup died in eleven days. Yellow leaves, mushy roots, a smell I still remember.
I’d followed a YouTube tutorial shot in someone’s Ohio kitchen, step by step, and none of it accounted for my RO water, my June humidity, or the two-hour power cut my building gets every afternoon.
It took me four failed batches and one very patient conversation with a hydroponics farmer in Nashik before I understood why. This is everything I wish someone had told me before I started my kitchen counter hydroponics journey.
The Real Problem With Kitchen Counter Hydroponics in India Isn’t What You Think
Every guide I’d read blamed beginner mistakes — wrong nutrients, not enough light, poor seed quality. I checked all of that. My light was fine. My nutrients were measured to the millilitre. My seeds were fresh. And my plants still died.
The truth is that kitchen counter hydroponics guides written for American or European kitchens quietly assume things that don’t hold true in an Indian home.
They assume your tap water has a stable, moderate mineral content. They assume your kitchen sits at 20°C with 40% humidity. They assume your power never cuts. None of that describes a flat in Mumbai, Pune, Bangalore, Delhi, or Chennai.
Once I stopped treating my failures as “beginner mistakes” and started treating them as an environment mismatch, everything changed.
I rebuilt my setup around Indian conditions instead of fighting them, and my current basil plant is on its fourth harvest. Here’s exactly what was going wrong, and the fix for each one.
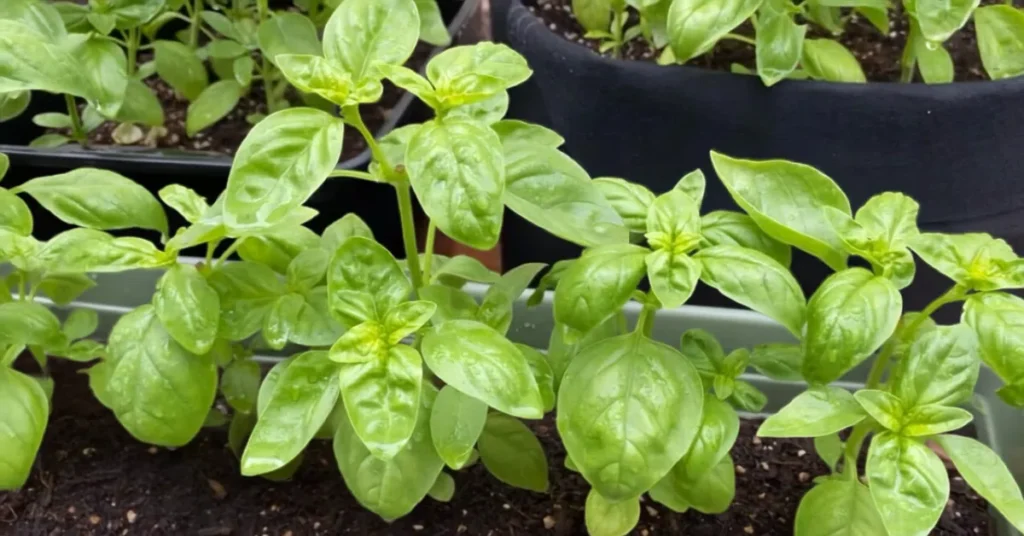
Problem 1: Your RO or Borewell Water Is Silently Starving the Roots
This is the mistake nobody warns you about, and it’s the one that killed my first three batches.
Most Indian households either run RO purifiers or draw from municipal supply with heavy mineral content, depending on the city.
Delhi and parts of Rajasthan have notoriously hard water. Coastal cities like Mumbai and Chennai often have moderate-to-high TDS depending on the source. RO water, on the other hand, is stripped almost bare — which sounds clean, but hydroponic plants actually need a small mineral baseline in the water before you even add nutrients.
Here’s what was happening in my flat: my RO water was reading close to 15 ppm TDS. When I added a standard liquid hydroponic nutrient mix meant for tap water with moderate hardness, the resulting nutrient solution had almost no buffering capacity.
The pH would swing wildly within 24 hours — sometimes from 6.2 in the morning to 7.8 by evening. At that swing, roots simply can’t absorb iron and calcium properly, and that’s exactly the yellowing I saw.
Interestingly, water hardness doesn’t just affect hydroponic roots — it’s just as damaging to regular potted plants. If you’re noticing white mineral crust or brown leaf tips on your soil-grown indoor plants too, I’ve written a separate breakdown on how hard water damages indoor plants and the exact fixes that worked for me — many of the same RO-mixing principles apply there as well.
The Fix
- Test your water source first. A basic digital TDS meter costs under ₹400 on Amazon India and pays for itself in saved plants. RO water under 50 ppm needs remineralising before you start; borewell or hard municipal water over 300 ppm needs diluting with RO water instead of using it straight.
- If you’re on RO water: add a pinch (roughly 1/8 tsp per 4 litres) of Epsom salt along with your regular nutrient solution. This restores the magnesium baseline RO strips out.
- If you’re on hard municipal or borewell water: cut it 50:50 with RO or filtered water before mixing nutrients, rather than using either source at full strength.
- Check pH daily for the first two weeks, then every 2-3 days once the system stabilises. Keep it between 5.5 and 6.5. If it drifts high, a few drops of diluted white vinegar brings it down. If it drifts low, a pinch of baking soda dissolved in water brings it up. You don’t need imported pH-adjustment liquids for a small kitchen counter setup — these two kitchen staples work fine at this scale.
I now test my water source before starting any new tray, and I haven’t lost a batch to pH swing since.
Problem 2: Monsoon Humidity Is Rotting Roots Before You Even Notice a Problem
My second failure came in July, during peak monsoon in Maharashtra. The plants looked fine on the surface for nearly two weeks, then collapsed within 48 hours. I pulled the net pots out and the roots were brown, slimy, and smelled sour — classic root rot.
Here’s the part most kitchen counter hydroponics content, written for drier or temperate climates, completely misses: in a Kratky or passive setup, water level drop is your feedback signal.
As plants use water, the reservoir level should visibly fall, which pulls more air into the growing chamber and keeps roots oxygenated. During Indian monsoon months, ambient humidity in a closed kitchen can sit above 80%.
Evaporation slows down dramatically, so the water level barely drops even though your plant is technically growing. The roots stay submerged far longer than they should, oxygen depletes, and rot sets in — while everything above the waterline still looks healthy.
The Fix
- Switch to a bigger air gap system during monsoon months (June to September). Fill your reservoir to only 60% of the net pot’s base rather than the usual 80%, so roots are forced to grow down into water while keeping more of the upper root zone exposed to air.
- Add a small aquarium air pump with an air stone (available for ₹200-350 in any pet or aquarium shop in India) during the humid months. This single change solved my monsoon rot problem completely — active aeration compensates for the slow evaporation and keeps dissolved oxygen high even when water levels barely change.
- Run a small desk fan near your setup for 2-3 hours a day. Air movement across the reservoir surface speeds up evaporation and gas exchange even in a stuffy, humid kitchen.
- Inspect roots weekly, not just leaves. By the time monsoon root rot shows up in the leaves, it’s usually too late to save that batch. Lift the net pot gently once a week and check that the roots are white or pale cream, not brown or slimy.
This one change — the air pump — is, in my experience, the single most important upgrade for anyone doing kitchen counter hydroponics anywhere in India with a real monsoon season.
Problem 3: Power Cuts Are Undoing Your Setup Without You Realising It
If you’re running any kind of pump-based hydroponic system — even a small circulating one — a two-hour load-shedding window can undo days of healthy growth. I learned this the hard way with a small DWC (deep water culture) bucket that relied on a continuous air pump. My building has a scheduled cut most weekday afternoons, and I hadn’t accounted for it at all.
The Fix
- Go passive wherever possible. The Kratky method needs zero electricity because there’s no pump — the plant simply draws water down as it grows, and the shrinking water level creates the air gap roots need. For leafy greens, herbs, and lettuce on a kitchen counter, this is genuinely the more reliable choice for Indian conditions, not a downgrade.
- If you do use an air pump (recommended for monsoon months, as above), get a USB-powered one and connect it to a small power bank or your home inverter line, not a bare wall socket. A basic USB aquarium air pump costs about ₹250-400 and will keep running through most load-shedding windows if it’s on inverter backup.
- Know your local cut schedule and plan around it. If your area has predictable outage timing, position pump-dependent systems so the outage falls during a period when water levels are already high (right after a top-up), giving roots a buffer before oxygen depletion becomes a real risk.
Problem 4: Your Container Material Is Reacting Badly to Indian Kitchen Heat
My fourth failed batch wasn’t a nutrient or water problem at all — it was the container. I’d used an old dark green plastic bottle I had lying around, cut down and repurposed as a Kratky jar. Within days, the nutrient solution had turned cloudy and developed a faint algae bloom, even though the setup was nowhere near direct sunlight.
Indian kitchens, especially on higher floors or west-facing flats, run warmer than most hydroponics guides account for — often 28-34°C for large parts of the year. Dark or translucent plastic containers let in enough ambient light to trigger algae growth in warm nutrient solution, and thin plastic can leach faster at higher temperatures.
The Fix
- Use opaque containers only — steel dabbas, ceramic pots, or plastic containers wrapped in aluminium foil or dark tape work perfectly and cost nothing extra if you’re repurposing what’s already in your kitchen.
- Steel containers are genuinely excellent for this if you’re not running an electrical current through the solution (as in basic Kratky or DWC without metal probes) — they don’t leach, they don’t degrade in heat, and most Indian kitchens already have a spare steel dabba or tiffin box lying around.
- Keep the setup away from direct afternoon sun through glass windows. Bright, indirect light is what you want — a spot that gets morning light or is 3-4 feet back from a west-facing window works better than a sill that bakes all afternoon.
- If algae does appear, don’t panic and don’t add chemicals. Empty the container, scrub with a mix of water and a little salt, rinse thoroughly, and refill with fresh solution. Wrapping the container in foil afterward almost always prevents recurrence.
Problem 5: Using Nutrient Ratios Built for Kale and Basil, Not Methi and Palak
Most hydroponic nutrient guides and pre-mixed solutions available online are formulated with American or European leafy greens in mind — kale, arugula, romaine. When I first grew methi (fenugreek) and palak (spinach) using a standard “leafy greens” nutrient ratio, both grew leggy and pale rather than dense and dark green.
Indian leafy greens like methi, palak, coriander, and pudina (mint) tend to want slightly higher nitrogen in the early growth phase than the standard Western-formulated mixes provide, since these are traditionally grown in nitrogen-rich soil back home.
The Fix
- For methi, palak, and coriander: run your nutrient solution at the higher end of the manufacturer’s recommended EC/PPM range for the first 10-12 days, then taper to standard strength once true leaves appear.
- For pudina (mint) and curry leaf cuttings: these actually prefer a slightly weaker nutrient solution than leafy greens — about 70% of standard strength — since they’re naturally hardy, low-demand plants. Overfeeding mint in hydroponics causes weak, floppy stems.
- Grow methi and coriander from kitchen seed stock, not packaged hydroponic seed. Whole methi seeds or coriander seeds from your spice box germinate readily in a hydroponic tray and are far cheaper than imported seed packets — just don’t use ones that have been heat-treated or coated, which some packaged spice-grade seeds are.
The Complete Kitchen Counter Hydroponics Setup Checklist for Indian Apartments
Once I fixed each of the five problems above, I put together this checklist so I wouldn’t repeat old mistakes with new trays. Use it every time you start a fresh batch.
Before you start:
- Test your water source with a TDS meter (RO under 50 ppm needs remineralising; hard water over 300 ppm needs diluting)
- Choose an opaque container — steel, ceramic, or foil-wrapped plastic
- Pick a spot with bright indirect light, away from direct afternoon sun
- Decide passive (Kratky) vs. active (air pump) based on the season — passive by default, active with air pump during monsoon months
- If using a pump, confirm it’s on inverter or power-bank backup
At setup:
- Mix nutrient solution to correct strength for your specific crop (higher nitrogen for methi/palak, lower strength for mint)
- Adjust pH to 5.5-6.5 using diluted vinegar (to lower) or baking soda solution (to raise)
- Fill reservoir to 60% of net pot base during humid months, 80% during drier months
- Label your tray with the start date — this makes troubleshooting timelines much easier later
Weekly maintenance:
- Check pH every 2-3 days once stable
- Lift net pots weekly to inspect root colour (should be white/pale cream)
- Top up reservoir when water level drops by roughly one-third
- Run a desk fan near the setup for a few hours during humid weeks
- Wipe down container exterior to prevent algae buildup on the outside surface
Every 12-14 days:
- Fully replace nutrient solution rather than just topping up, especially for fast growers like methi and palak
- Rinse container and net pot with plain water before refilling
- Re-test water source TDS if you’ve switched RO filters or noticed inconsistent growth
Best Herbs and Vegetables for Kitchen Counter Hydroponics in Indian Homes
Not every plant suits a small, soil-free kitchen setup, and not every “beginner-friendly” plant from foreign guides suits Indian growing conditions or Indian kitchens. Based on what has actually worked consistently on my counter over multiple seasons:
Reliable through most of the year:
- Pudina (mint) — hardy, forgiving, tolerates our heat well
- Coriander — fast-growing, though it bolts quickly in peak summer, so plan for shorter harvest cycles April to June
- Curry leaf (from a rooted cutting rather than seed) — slower to establish but very rewarding once it takes
Best in cooler months (October to February):
- Palak (spinach) — grows dense and dark green when nitrogen levels are right
- Methi (fenugreek) — quick to germinate, ready to harvest in as little as 3 weeks
- Lettuce varieties — struggle in peak summer heat but do beautifully in Indian winter
Needs the most careful monitoring:
- Basil — sensitive to both overwatering and pH swings, a good plant to test your setup’s stability before scaling up
- Cherry tomatoes — possible on a counter but need significantly more light and a bigger reservoir than herbs; better suited to a slightly larger setup than pure “kitchen counter” scale
Troubleshooting Quick Reference
| What You’re Seeing | Likely Cause | Fix |
| Yellowing leaves, healthy-looking roots | pH swing from RO water | Test TDS, add Epsom salt pinch, recheck pH |
| Plant looks fine, then collapses suddenly | Monsoon root rot | Add air pump, reduce fill level to 60% |
| Cloudy water, algae smell | Light reaching the reservoir | Switch to opaque container, move from direct sun |
| Leggy, pale growth | Nutrient mismatch for crop type | Increase nitrogen strength for palak/methi |
| Weak, floppy stems on mint | Nutrient solution too strong | Dilute to 70% strength for mint and curry leaf |
| Plant wilts after power cut | Pump-dependent system lost aeration | Switch to passive Kratky or add backup power |
How I Actually Take Care of My Kitchen Counter Hydroponics Now
My current routine, after several failed batches, is far simpler than anything I started with:
I test the water source once per new tray, not every single day — once you know your RO or tap water’s baseline, it rarely changes suddenly unless you switch filters.
I check pH every two to three days with cheap strips rather than a digital pen, which is accurate enough at this small scale.
I lift the net pots for a root check once a week, usually on Sundays when I’m already in the kitchen. I keep an aquarium air pump running through the monsoon months and disconnect it the rest of the year, since passive Kratky works fine once humidity drops.
And I fully replace the nutrient solution every 12-14 days instead of just topping it up, which has made a bigger difference to plant health than almost anything else on this list.
None of this requires imported equipment or an expensive kit. My entire current setup — steel container, aquarium air pump, TDS meter, pH strips, and nutrient solution — cost me under ₹1,500 total, and most of it I already had sitting around the house.
What Kitchen Counter Hydroponics Actually Costs to Start in India
One thing that put me off kitchen counter hydroponics for almost a year before I actually tried it was the pricing on imported kits — ₹4,000 to ₹12,000 for a plastic unit with pods and a grow light. I want to be upfront about what I actually spent, because it’s a fraction of that.
One-time costs:
- Steel dabba or repurposed container: ₹0 (already had it) to ₹150 for a new one
- TDS meter: ₹350-450
- pH testing strips (100 strips, lasts months): ₹150-200
- Small aquarium air pump with air stone: ₹250-400
- Net pots or repurposed plastic cups with holes poked in: ₹0-100
Recurring costs, per batch:
- Liquid hydroponic nutrient solution (a 500ml bottle lasts 8-10 batches): ₹300-450 for the bottle, so roughly ₹35-50 per batch
- Seeds: often ₹0 if you’re using methi, coriander, or mint from your own kitchen stock
My entire kitchen counter hydroponics setup, start to finish, cost under ₹1,200, and the ongoing cost per batch after that is barely more than what I’d spend on a bunch of fresh coriander from the sabzi mandi. This is the part most guides skip, because kit-selling sites obviously want you buying their ₹5,000 unit instead of a steel dabba from your own kitchen shelf.
A Realistic Seasonal Calendar for Kitchen Counter Hydroponics in India
Because Indian weather swings so much more than the temperate climates most hydroponics content is written for, I now plan my kitchen counter hydroponics batches around the season rather than starting something new whenever I feel like it. This single shift cut my failure rate more than any individual fix above.
October to February (winter, most reliable window): This is genuinely the best stretch for kitchen counter hydroponics almost anywhere in India. Humidity drops, temperatures are moderate, and passive Kratky setups run beautifully with minimal intervention. Palak, lettuce, and methi all do their best growth in this window.
March to May (summer, needs the most attention): Water temperature in the reservoir climbs fast, especially on higher floors or in west-facing kitchens. Top up more frequently, keep the container out of direct light entirely, and expect coriander and lettuce to bolt (flower early and turn bitter) faster than usual. Mint and curry leaf tolerate this stretch far better than leafy greens.
June to September (monsoon, needs active aeration): This is where the air pump fix from earlier becomes non-negotiable rather than optional. Humidity stays high enough that passive systems alone often aren’t reliable, and root rot risk is at its highest. I now treat monsoon as a “maintenance mode” season — smaller batches, closer weekly root checks, and a scaled-back ambition until October.
Common Myths About Kitchen Counter Hydroponics I Believed at First
“You need a grow light for kitchen counter hydroponics to work indoors.” Not necessarily. If your counter gets 4-5 hours of bright indirect light near a window, most herbs and leafy greens do fine without a supplemental LED. I only added a basic light once I moved the setup deeper into the kitchen, away from the window.
“Tap water and RO water work the same way for hydroponics.” As covered above, they don’t — and this single assumption is probably responsible for more failed kitchen counter hydroponics attempts in Indian homes than any other factor.
“Hydroponics is low-maintenance once it’s set up.” It’s low-effort, not zero-effort. The weekly root check and periodic nutrient replacement genuinely matter, especially in our climate swings.
“You need imported nutrients for good results.” Locally available liquid hydroponic nutrient solutions, sold by several Indian agri-input companies and available on Amazon India, work perfectly well. What matters more is getting the strength right for the specific crop, not the country of origin.
Where I Actually Source Everything for My Setup
A question I get asked often is where to find the components locally rather than ordering everything online.
For the steel container, any tiffin or dabba shop in a local market works, and honestly, most Indian kitchens already have a spare one sitting unused.
TDS meters, pH strips, and aquarium air pumps are all easy to find on Amazon India or Flipkart, or at a local aquarium/pet shop if you’d rather not wait for delivery — I got my first air pump from a small aquarium shop near my building for less than the online price.
For nutrient solution, I’d avoid the very cheapest unbranded bottles sold loose at some nurseries, since concentration consistency varies from batch to batch and makes troubleshooting harder.
A mid-range branded liquid hydroponic nutrient solution, sold specifically for leafy greens, gives you predictable results you can actually calibrate against.
For seeds, this is where I save the most money. Methi, coriander, and even some mint cuttings come straight from my own kitchen rather than a seed packet.
If you do want packaged seed for palak or lettuce, a local nursery or garden centre almost always has more consistent germination rates than random online sellers, and you can ask them directly whether a batch has been treated or coated, which matters for hydroponic use.
None of this requires a specialised hydroponics store. It requires a slightly different way of looking at what’s already available in an ordinary Indian kitchen and local market.
The Bottom Line
Kitchen counter hydroponics doesn’t fail in Indian apartments because the method is flawed — it fails because most of the advice available online was never built for our water, our humidity, or our power supply in the first place.
Once you treat those three things as the actual variables to manage, rather than chasing generic troubleshooting tips written for a completely different climate, this becomes one of the easiest and most rewarding things you can grow in a small urban kitchen.
I’ve now run this same kitchen counter hydroponics setup through two full monsoons, a Mumbai summer, and a stretch of unpredictable winter power cuts, and it hasn’t failed once since I made these five changes.
The plants aren’t fussy once the environment around them is right — they never were. It was the setup that needed fixing, not the method.
If you’re starting your own setup this week, begin with the checklist above, pick one forgiving crop like mint or coriander for your first batch, and give it two full weeks before judging the results. That’s exactly how mine finally started working — and it’s still going.

FAQs
Is RO water bad for hydroponics?
Not bad, but incomplete. RO water lacks the baseline minerals plants need alongside your nutrient solution. Adding a small pinch of Epsom salt corrects this without needing specialised products.
Can kitchen counter hydroponics survive Indian summers without air conditioning?
Yes, though water temperature matters more than air temperature. Keep the reservoir out of direct sun and top up more frequently, since evaporation speeds up in summer heat.
Do I need an electric pump for kitchen counter hydroponics?
No. The Kratky method works with zero electricity and is actually more reliable in Indian homes with irregular power supply. A pump helps mainly during high-humidity monsoon months.
How long does it take to see results with kitchen counter hydroponics?
Fast-growing crops like methi and coriander are ready to harvest in as little as 18-21 days. Leafy greens like palak typically take 25-30 days. Herbs like mint and basil take a bit longer to establish but then keep producing for months.
Is kitchen counter hydroponics expensive to start in India?
Not if you build it yourself rather than buying an imported kit. A basic working setup using a steel container, seeds, and a small bottle of nutrient solution can be built for well under ₹1,000.
Can I do kitchen counter hydroponics in a rented flat without permanent changes?
Yes, this is actually one of its biggest advantages over soil gardening for renters. There’s no drilling, no soil mess, and no fixtures — everything sits on the counter and can be packed away in a bag if you move.
Transparency Note: I am not affiliated, associated, or partnered with Amazon India, Flipkart, or any specific hydroponic nutrient or equipment brands mentioned in this article. I do not earn any commission or financial incentive if you purchase the tools or supplies linked or mentioned above. All recommendations, prices, and sourcing tips are entirely based on what I personally bought and tested with my own money in my kitchen.