Most Indian nursery plants aren’t packed in peat moss at all — they’re packed in cocopeat, and treating it the wrong way is why new plants sulk for weeks. Here’s what’s actually in that bag, and the exact repotting routine I use to keep plants thriving after.
If you have ever bought a plant from a nursery in India and pulled it out of its bag to find the roots wrapped in a dark, fibrous, slightly spongy material instead of normal soil, you are not alone. I get asked about this almost every week — usually by someone who has just spent good money on a fiddle leaf fig or a money plant and is staring at this mystery material wondering if the nursery has cheated them.
It hasn’t. That dark fibrous packing is peat moss (or very often, a peat-coir blend), and there is a very practical reason nurseries across India use it. But here’s the part nobody tells you at the time of purchase: if you just dump that root ball straight into a pot of garden mitti, you are setting your plant up to struggle, sometimes for months, before it either adapts or dies quietly on you.
Let me walk you through why nurseries pack plants this way, what’s actually happening to the roots inside that bag, and the exact steps you need to follow before repotting so your plant doesn’t go into shock.
What Is Peat Moss and Why Is It So Popular in Plant Nurseries?
Peat moss is partially decomposed sphagnum moss harvested from bogs, mostly imported into India from countries like Latvia, Estonia, and Canada since we don’t have natural peat bogs worth commercial harvesting here. It’s expensive — often more expensive per kilo than regular potting soil, so nurseries aren’t using it to cut corners. They’re using it because it solves three problems that regular Indian garden soil cannot.
First, it’s incredibly light. The weight of a peat moss bag is only a fraction of the weight of an equal volume of black cotton soil or red laterite soil. For a nursery in Karnataka to transport thousands of saplings to buyers in Delhi and Mumbai, weight equals cost. It’s that simple.
Second, peat moss holds water like a sponge but doesn’t get waterlogged the way our clayey soils do. This matters enormously during transit. A sapling can sit in a delivery truck or warehouse for anywhere from two days to two weeks. Peat moss keeps just enough moisture around the roots to keep them alive without drowning them, which regular soil, especially the heavy black soil common in central India — simply cannot do consistently.
Third, and this is the one most people do not realize, peat moss is sterile or nearly sterile. Indian garden soil, particularly when it has been left exposed in an open yard, is packed with fungal spores, nematode eggs, and weed seeds.
When a plant is packed in peat moss for transport, the risk of the plant arriving with root rot or some soil-borne disease already underway in the bag is drastically reduced, so from the nursery perspective, and frankly, from a transport logistics perspective — peat moss is a smart, low-risk choice. It is when the plant comes home that the trouble begins.
Peat Moss vs. Indian Soil: What Most Gardeners Don’t Realize
This is the part I really want you to understand, because it’s the difference between a plant that thrives and one that limps along for six months.
Peat moss has a special affinity to water: when moist, it retains water well, but when peat moss is even slightly dry, it becomes hydrophobic (meaning water beads up on the surface and runs off rather than soaking in). If you have ever watered a pot and watched the water pool on top and run down the sides of the nursery bag rather than going in, you have seen dried peat do what dried peat does.
Now here is where the trouble compounds. If you take that root ball, still wrapped in its peat moss, and plant it directly into a pot filled with ordinary Indian potting mix — say, a typical mix of red soil, cocopeat, and compost that you bought from your local nursery or made at home — you’ve created two completely different moisture zones in the same pot.
The surrounding soil may be uniformly moist, but the peat moss core, located at the center of the root mass, will dry out more quickly and may become hydrophobic and refuse to take up water again.
At the same time, those new fine root hairs that the plant is attempting to grow out into your soil are in very different conditions (pH, texture, moisture retention) than the older roots that are still entangled in the peat.
The result is what nursery owners and serious gardeners here call “transplant shock,” except it’s a slow, confusing version of it. The plant doesn’t die in three days. It just stops growing. Leaves yellow at the edges.
New growth is stunted or doesn’t come at all. Three months later you’re convinced you have a “black thumb” when actually the issue was never your watering — it was that hidden peat core acting like a separate, badly-behaving pot inside your pot.
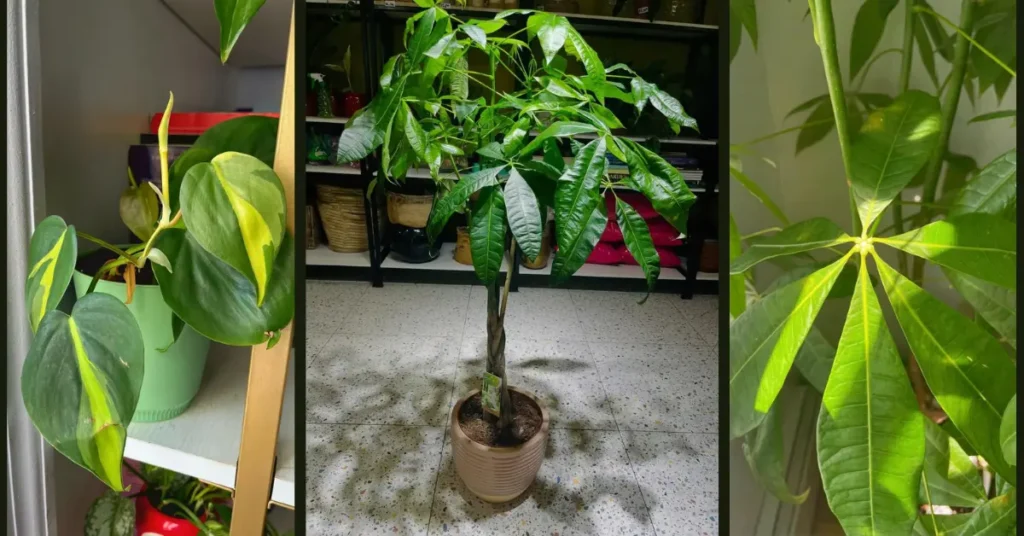
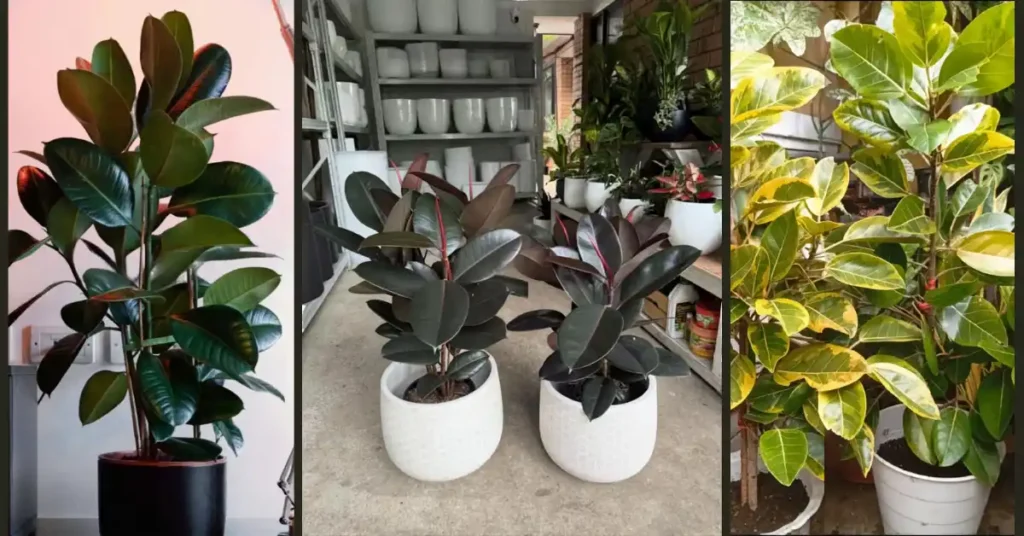
I’ve seen this exact pattern on ficus, money plants, hibiscus, and especially on flowering ornamentals like gardenias and azaleas that nurseries in Pune and Bangalore commonly ship in peat-heavy mixes.
The plant looks perfectly healthy in the nursery bag and then sulks for months after a careless repotting.
Why Peat Moss and Indian Soil pH Often Don’t Match
Here’s a detail that almost nobody mentions, and it genuinely matters if you’re growing anything beyond the most forgiving houseplants. Peat moss typically has a pH between 3.5 and 4.5 — quite acidic. Most Indian garden soils, particularly the alkaline soils common across large parts of Gujarat, Rajasthan, Haryana, and the Deccan plateau, sit well above neutral, often in the 7.5 to 8.5 range.
Source: Iowa State University Extension and Outreach
When you plant a peat-packed root ball directly into alkaline garden soil, the roots are sitting at the boundary of two very different pH environments.
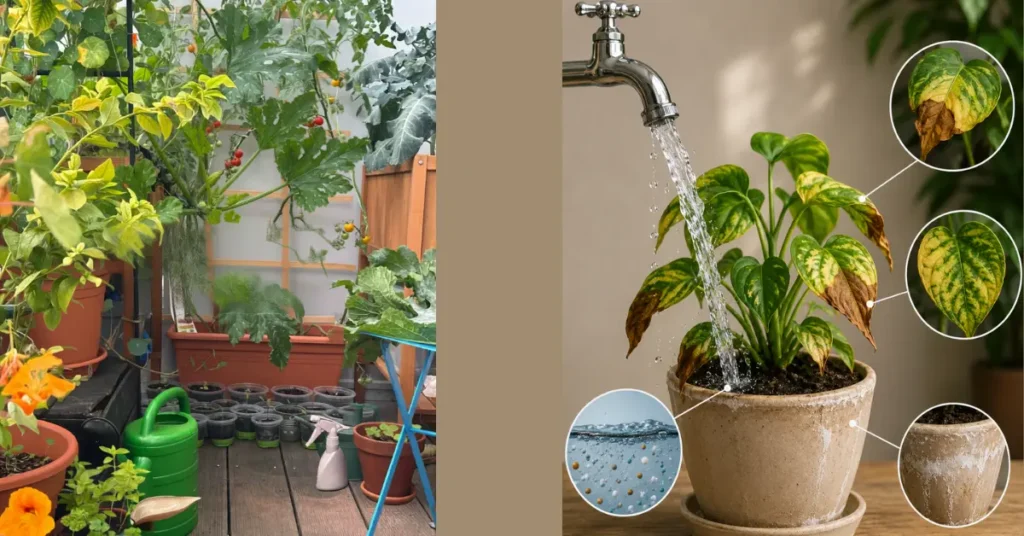
For acid-loving plants like azaleas, gardenias, hydrangeas, or even your hibiscus, this mismatch can interfere with nutrient uptake — particularly iron and manganese — leading to that yellowing-between-the-veins look (iron chlorosis) that so many people mistake for a watering or fertilizer problem and end up making worse by adding more fertilizer.
This is also why I tell people: if your hibiscus or gardenia bought from the nursery starts showing yellow, veiny leaves a month or two after you’ve repotted it, check your soil pH before you touch the fertilizer bottle again. Often the issue traces straight back to that leftover peat moss core sitting in mismatched soil.
What You Must Actually Do Before Repotting
This is the part that matters. Skip the theory, here is the exact process I follow, and recommend to anyone who asks me at my local nursery or in my gardening WhatsApp groups.
Step 1: Never repot the same day you bring the plant home
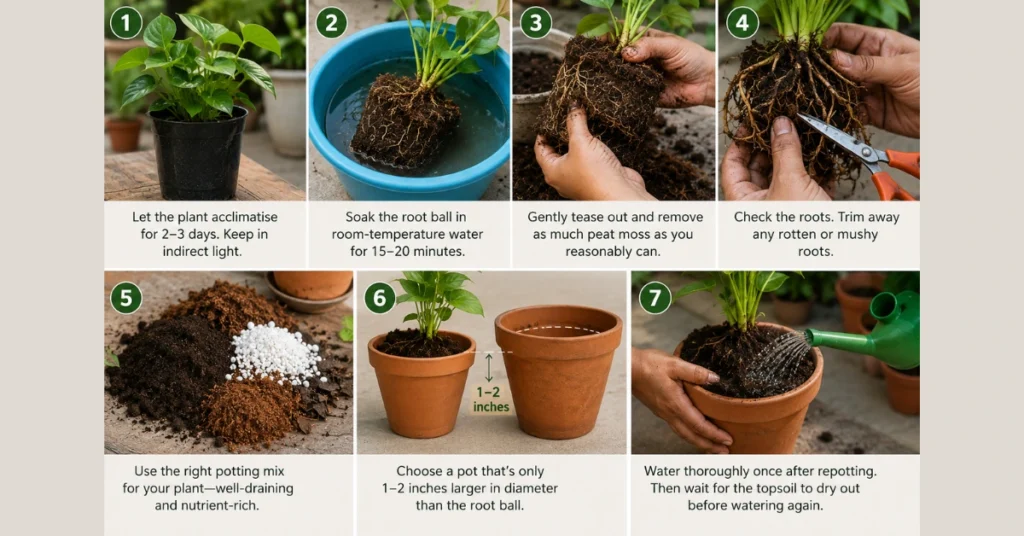
Give the plant at least two to three days to acclimatise to your home’s light, humidity, and temperature before you disturb the roots at all. Indian summers especially are brutal — moving a plant from a shaded nursery polyhouse straight into a sunny balcony and repotting it on the same day is asking for double the stress at once. Just water it lightly if the peat feels dry, keep it in indirect light, and let it settle.
Step 2: Soak the root ball before you do anything else
Fill a bucket with room-temperature water — not cold tap water straight from an overhead tank in summer, that thermal shock doesn’t help either — and submerge the entire root ball, peat and all, for about 15 to 20 minutes. This rehydrates the peat fully and makes it far easier to work with. Dry peat crumbles and resists your fingers; wet peat loosens up and lets go of the roots much more willingly.
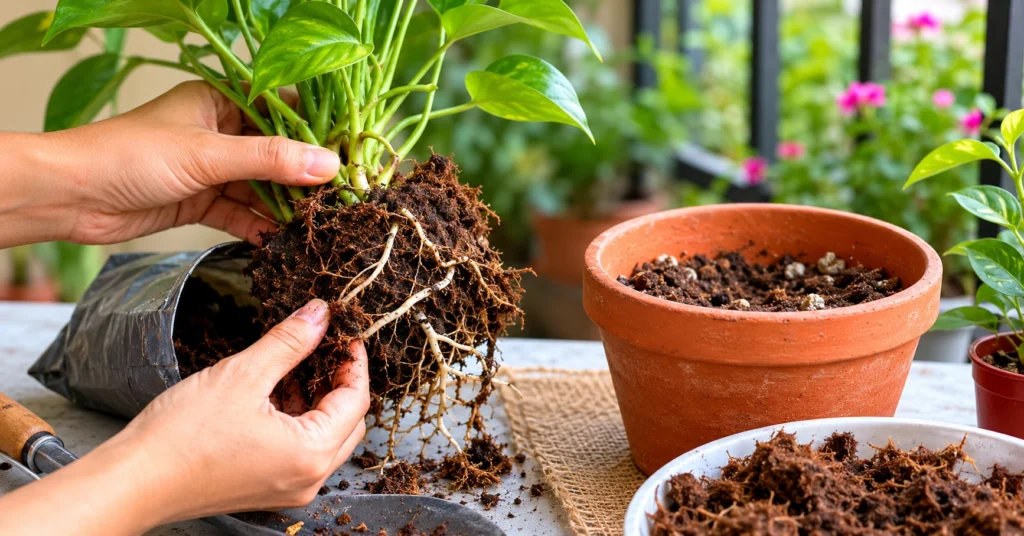
Step 3: Gently tease out as much peat as you reasonably can
This is the step almost everyone skips, and it’s the single most important one. After soaking, use your fingers — not a knife, not a stick, your actual fingers — to gently work through the root ball and remove as much of the peat moss as you can without tearing the fine root hairs. You are not trying to get it spotlessly clean. You’re trying to expose enough of the root system that it makes good direct contact with your new potting mix rather than staying isolated inside a peat capsule.
For plants with a dense, fibrous root system like money plants, pothos, or ferns, you can be reasonably thorough. For plants with thicker, more sensitive roots — like most flowering shrubs, citrus, or anything in the ficus family — be gentler and accept that some peat will remain tangled in. That’s fine. The goal is reducing the peat barrier, not eliminating it entirely.
Step 4: Check the roots while you’re in there
While you’ve got the root ball exposed, take thirty seconds to actually look at the roots. Healthy roots are usually white, cream, or light tan and feel firm. If you see roots that are dark brown or black, feel mushy, or smell distinctly sour or rotten, that’s root rot, and it’s far better to catch it now than three weeks after repotting when the plant is already collapsing. Trim away any obviously rotten roots with a clean, sharp pair of scissors before proceeding.
This slow collapse is sneakier than people expect. It rarely looks dramatic. The plant just quietly stops putting out new growth, and by the time the leaves start yellowing, the damage has usually been sitting there for weeks. I see the exact same pattern on balcony mint constantly — it doesn’t die in a day, it just gives up gradually, and most people never connect it back to the roots. I’ve written about that whole pattern here if you want to see how it plays out on a plant that’s a lot less forgiving than money plants or pothos.
Step 5: Match your new potting mix to the plant, not just to “good soil”
Don’t just buy whatever bag is labelled “potting mix” at your local nursery and assume it’s right for everything. A money plant or pothos will be perfectly happy in a standard mix of cocopeat, compost, and a bit of perlite or sand for drainage.
But citrus, hibiscus, and other plants that like slightly acidic, well-draining conditions do better with cocopeat or leaf mould mixed in rather than straight alkaline garden soil. Succulents and cacti need a much sandier, faster-draining mix regardless of what the original peat packing was.
If you’re working with acid-loving ornamentals and you know your tap water or local soil leans alkaline (most municipal water in north India does), mixing in a handful of well-rotted leaf compost or even a small amount of used tea leaves and coffee grounds worked into the top layer over the following weeks can help nudge the pH back down gradually. Don’t overdo this — a little goes a long way, and too much can attract fungus gnats, especially in humid weather.
Step 6: Choose a pot that’s only one size up
This is a classic Indian gardening mistake — buying a plant in a 6-inch nursery bag and immediately putting it into a large decorative ceramic pot because it looks better.
Resist this. A pot that’s drastically larger than the root ball holds far more soil volume than the roots can use, which means that extra soil stays wet for much longer after watering, and that’s a direct invitation for root rot, especially in our humid coastal cities or during monsoon.
Go up by about 2 inches in diameter at most. You can always report again in six to eight months as the plant grows.
Step 7: Water deeply, but only once, immediately after repotting — then back off
Right after repotting, water the new mix thoroughly so it settles around the roots and removes air pockets. Then resist the urge to water again for several days.
Newly disturbed roots are vulnerable to rot, and the temptation in Indian households is always to overwater out of anxiety. Let the topsoil dry out between waterings for the first couple of weeks while the plant recovers.
What Summer and Monsoon Gardeners Should Know
Timing matters more than people realise. If you can, avoid repotting during the peak of an Indian summer (April to early June across most of the country) when heat stress is already high, or right in the middle of heavy monsoon downpours when excess ambient moisture combines badly with disturbed, wet roots to invite fungal issues.
The sweet spots are early monsoon (the first gentle showers in June) when humidity is rising but the deluge hasn’t started, or post-monsoon into early winter (October to November) when temperatures are moderate across most regions.
If a plant arrives and genuinely needs urgent repotting outside these windows because the roots are visibly rotting or pot-bound, do it anyway — a sick plant won’t wait for ideal weather — but otherwise, patience with timing saves you a lot of recovery headaches later.
What I Do Before Planting Any Nursery Plant
Nurseries ship plants wrapped in peat moss for perfectly good commercial reasons: It is lightweight, it holds moisture well during transit, and it arrives largely disease free.
That is not the issue; the issue is what occurs when that peat-wrapped root ball is transplanted into Indian garden soil without any intervening conditioning: mismatched moisture behaviour, mismatched pH, and roots that never really adjust to their new home.
The fix isn’t complicated, but it does take those extra fifteen minutes that most of us skip because we’re excited to see the plant in its new pot.
Soak it, gently work out the peat, check the roots, match your soil to the plant’s actual needs, and resist the oversized pot. Do this consistently, and you’ll notice a real difference — plants that establish faster, push out new leaves within weeks rather than months, and simply look healthier through their first season in your home.
I’ve followed this exact routine with everything from cheap money plant cuttings to a fairly expensive imported gardenia that I was terrified of losing, and it’s never let me down. Give your new plant those fifteen minutes before it goes into its forever pot. It’s the cheapest insurance you’ll ever buy for something you’ve already spent money on.
Conclusion
Peat moss isn’t doing anything wrong here — it’s doing exactly the job it’s meant for in transit. The real failure point is the gap between unpacking the bag and putting that root ball into your soil, a gap most of us skip in fifteen minutes flat.
Soak it, work the peat loose, inspect the roots, match the mix to the plant, and size the pot sensibly. None of this is optional once you understand what hydrophobic peat and mismatched pH actually do underground.
I’ve run this process on everything from a five-rupee money plant cutting to an imported gardenia I genuinely couldn’t afford to lose. It has never once failed me. Spend the fifteen minutes — your plant’s first season depends on it.
FAQs
Can I just leave the peat moss as it is and skip removing it?
You can leave a thick peat core in place for a quick, low-stakes plant like a pothos or money plant, but for anything you are putting in the ground for the long haul, like citrus, hibiscus, gardenias, flowering shrubs, leaving the peat in place almost always ends in slow growth or yellow leaves; if it matters to you, take the fifteen minutes.
My plant’s leaves turned yellow two months after repotting. Is this peat moss related?
Very likely, yes especially if the yellowing shows up between the veins while the veins themselves stay green. That’s classic iron chlorosis caused by pH mismatch, not a watering or fertilizer problem. Check your soil pH first before reaching for more fertilizer; that usually makes it worse, not better.
How do I know if I’ve removed enough peat moss, or too much?
You don’t need it spotless. The goal is exposing enough roots to make direct contact with your new soil. If fine root hairs are tearing as you work, stop — you’re being too aggressive. A bit of peat tangled deep in the root ball is completely fine and won’t cause problems.
Is coco peat the same as peat moss, and does it cause the same issues?
No, and this trips up a lot of people. Coco peat is made from coconut husk, it’s roughly neutral in pH, and it rehydrates easily even when dry. Peat moss is sphagnum-based, acidic, and turns hydrophobic when dry. If your nursery bag is coco peat, most of these precautions matter far less.
Can I reuse the peat moss I removed instead of throwing it away?
Yes, and you should. Mix it into compost or use it as a thin top mulch layer for acid-loving plants like gardenias or azaleas. Just don’t pack it densely back around fresh roots — loose and mixed in is fine, compacted around roots is exactly what caused the problem in the first place.