Most seed-buying advice stops at “buy from a trusted source.” This guide goes further — showing you exactly how to inspect seeds, decode Indian seed packets, run a five-minute germination test at home, and store seeds so they stay viable. No guesswork, no wasted seasons — just what actually works.
If you have ever sown an entire packet of tomato or marigold seeds on your balcony and watched barely three or four of them sprout, you already know the problem this article is solving. It is not your watering. It is not your soil.
Nine times out of ten, when germination fails across the board, the seed itself was never going to grow — it was old, poorly stored, mishandled at some point between the farm and your hands, or simply mislabelled.
I have been growing vegetables, herbs, and flowering plants on terraces and balconies across three Indian cities for over a decade now, and if there is one lesson that took me the longest to learn, it is this: a beautiful seed packet with glossy photos tells you nothing about what is actually inside. The real information is smaller, duller, and usually printed in a 6-point font on the back — and most gardeners never learn to read it.
Forget vague advice like “buy from a trusted source” — that’s where most guides stop. Here, I’ll actually show you how to physically inspect seeds, decode what’s printed on an Indian seed packet, run your own germination test at home before betting a whole season on it, and store the good seeds you find so they don’t spoil within six months.
By the end, you’ll be able to walk into any nursery, Krishi Kendra, or online seed store and know within thirty seconds whether it’s actually worth planting.
Why Seed Quality Quietly Decides Everything Else in Your Garden
Most gardening advice online focuses on soil mix, sunlight, and watering schedules — and those matter, no doubt. But none of it matters if the seed you started with was already compromised.
A seed carries a fixed, non-renewable store of energy (the endosperm) that the embryo uses to push through soil and produce its first true leaves.
Once that energy reserve is degraded — by age, moisture damage, heat exposure, or fungal contamination — no amount of good soil or fertiliser can bring it back.
You are not fixing a weak seedling at that point; you are trying to grow a plant that was never going to happen.
This is why professional nurseries and seed companies obsess over three numbers: germination percentage, purity percentage, and moisture content. Home gardeners rarely see these numbers explicitly, but you can estimate all three yourself with the methods in this guide, and that single skill will save you more money and frustration over a gardening lifetime than any fertiliser hack.
If you’re already past the buying stage and dealing with seeds that simply won’t come up, the issue may already be sitting in your tray. I’ve written a dedicated fix for lauki, bhindi and moringa seeds that refuse to sprout — worth checking before you assume it’s a watering or soil problem.
The Physical Signs of a Good Quality Seed
Before you even think about germination tests, a seed will tell you a lot just by how it looks, feels, and smells. Here is what I personally check, in order, every single time I buy loose or packeted seeds.
1. Colour consistency within the batch
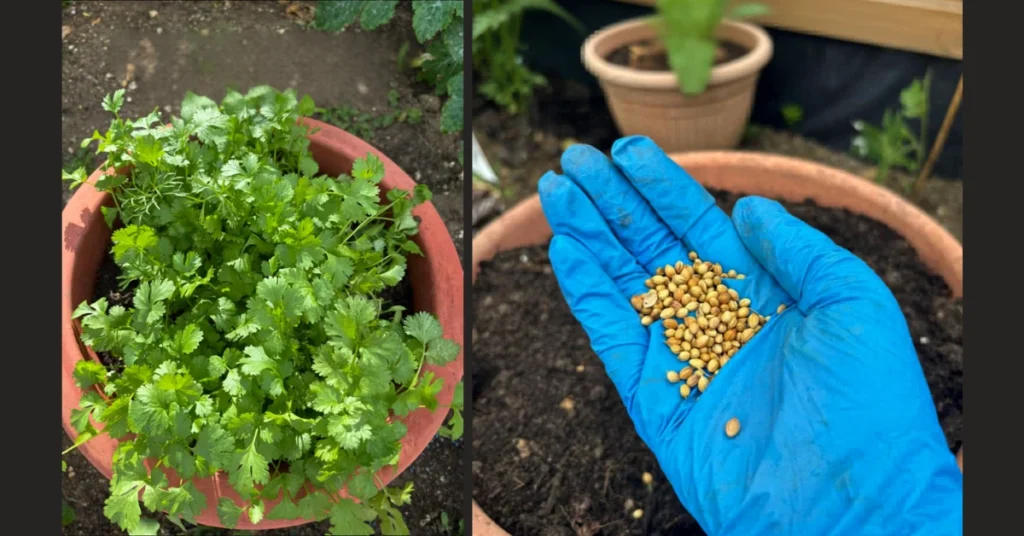
Every seed variety has a natural, expected colour — tomato seeds are pale yellow-brown, brinjal (eggplant) seeds are creamy white to light tan, spinach seeds are dark brown to black, marigold seeds are black with a pale tuft.
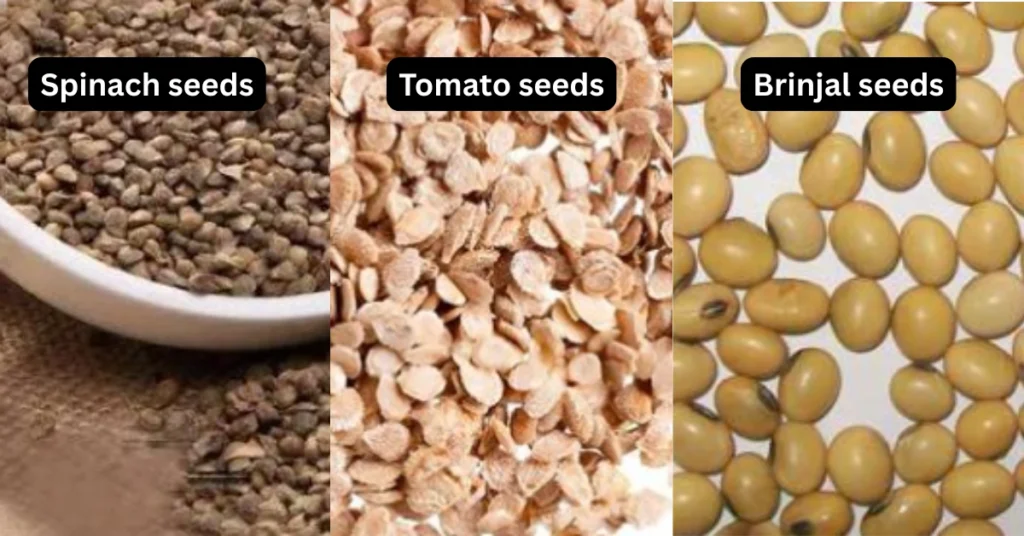
What you are checking for is not the exact shade, but consistency across the batch. If you tip out a spoonful of seeds and see a mix of dark, discoloured, blotchy, or unusually pale seeds among otherwise uniform ones, that inconsistency usually points to mixed harvest batches, sun or moisture damage, or old stock blended with fresh stock to pad out quantity — a practice that is unfortunately common with loose seed sold by weight in unregulated local markets.
2. Plumpness and weight
Pick up a few seeds and roll them between your fingers. Good seeds feel dense and slightly heavy for their size — this weight is the endosperm, the seed’s food reserve. Shrivelled, flat, or unusually light seeds have either not matured properly on the mother plant or have lost internal moisture and reserves through age. For larger seeds like beans, peas, pumpkin, and okra (bhindi), this is very easy to check by hand. For finer seeds like coriander or amaranth, do a quick water float test — I explain this in detail further below.
3. Surface texture — smooth, not shrivelled or pitted
Run your thumb over a small sample. Fresh, viable seeds have a relatively smooth, intact seed coat. Wrinkled, cracked, or pitted seed coats usually indicate one of two things: the seed dried out too fast after harvest (common with informally sun-dried seed saved by small growers), or pest damage from storage weevils, which is a genuinely widespread issue with seeds stored in open godowns during Indian summers.
4. No fungal smell or visible mould
This sounds basic, but it is the single most skipped check. Open the packet and smell it. A faint earthy smell is normal.
A sharp musty, sour, or ammonia-like smell is not — it means the seed was packed with residual moisture and has already started fungal degradation inside a sealed packet, which is far worse than exposed seed because the moisture has nowhere to escape.
Also visually check for any white, grey, or greenish dust clinging to the seed surface, especially in the corners of the packet.
5. No signs of insect activity
Tiny holes, a fine powdery residue (frass), or actual live weevils inside the packet mean the seed has been infested, usually during warehouse storage.
Infested batches have drastically reduced germination even if only a portion of the seeds show visible holes, because the rest have likely been exposed to the same humidity and temperature conditions that invited the pests in the first place.
6. Uniform size within the variety
Within a single variety and single harvest batch, seed size should be reasonably uniform. Wildly varying sizes in the same packet often indicate the seller has mixed seed lots from different harvests or even different sub-varieties to make up numbers — again more common in loose, unbranded seed sold in bulk at local mandis than in properly packeted seed.
7. The packet itself should feel sealed and untampered
Indian summers and monsoons are brutal on stored seed. A packet that feels damp, has condensation marks inside the plastic, or has clearly been resealed with tape after opening is a red flag regardless of how good the seeds inside look on day one.
How to Read an Indian Seed Packet Correctly (Most Gardeners Skip This)
This is the section that actually separates an informed buyer from someone relying on luck. Every legitimately sold seed packet in India, whether from a private company or a government agency, is required to carry certain information under India’s Seeds Act framework. Here is what to look for and what it actually means for you.
Packing/Processing date and “use by” or “valid up to” date — Look for both, not just one. Some brands only print a packing date and leave you to calculate shelf life yourself.
As a rule of thumb, most vegetable seeds remain reliably viable for 1 to 2 years from packing if stored properly, while onion, okra, and carrot seeds lose viability faster — often within a year — and should ideally be bought fresh each season rather than stocked up.
Lot number or batch number — This traceability code matters more than people realise. If an entire batch fails to germinate for you, a lot number lets you report the specific batch to the seller or manufacturer, and it is what allows a company to investigate and issue replacements. Never buy loose seed that has no lot number at all — you have zero recourse if it fails.
Germination percentage, when stated — Reputable Indian seed companies, especially those supplying to commercial and semi-commercial growers, print a tested germination percentage on the packet, commonly in the 70–90% range for vegetables. If a packet claims 95%+ with no testing body mentioned, treat that number with healthy scepticism rather than blind trust.
Certification or testing mark — Seed sold through state agriculture departments, Krishi Vigyan Kendras (KVKs), National Seeds Corporation (NSC), or state seed corporations is typically tested against standards set by agencies aligned with the Indian Minimum Seed Certification Standards. Packets from these sources, or from private companies that voluntarily follow ISTA (International Seed Testing Association) protocols for their germination claims, are a meaningfully safer bet than completely unbranded loose seed.
Net weight or seed count, not just packet size — Padded, oversized packets with a small printed net weight are a common visual trick. Always check the actual gram weight or seed count printed, not the size of the pouch.
Variety name written precisely, not just a generic crop name — A packet that just says “Tomato” tells you nothing about growth habit, days to maturity, or disease resistance. A properly labelled packet will say something like “Tomato — Hybrid, Determinate, 60–65 days” or name a specific variety. Vague labelling is often a sign of a repackaged, unofficial source.
Three Tests You Can Run at Home Before Sowing an Entire Packet
Do not sow your whole seed packet in one go, especially with a new supplier. Set aside a small test sample first. These three tests take very little time and will save you an entire growing season of disappointment.
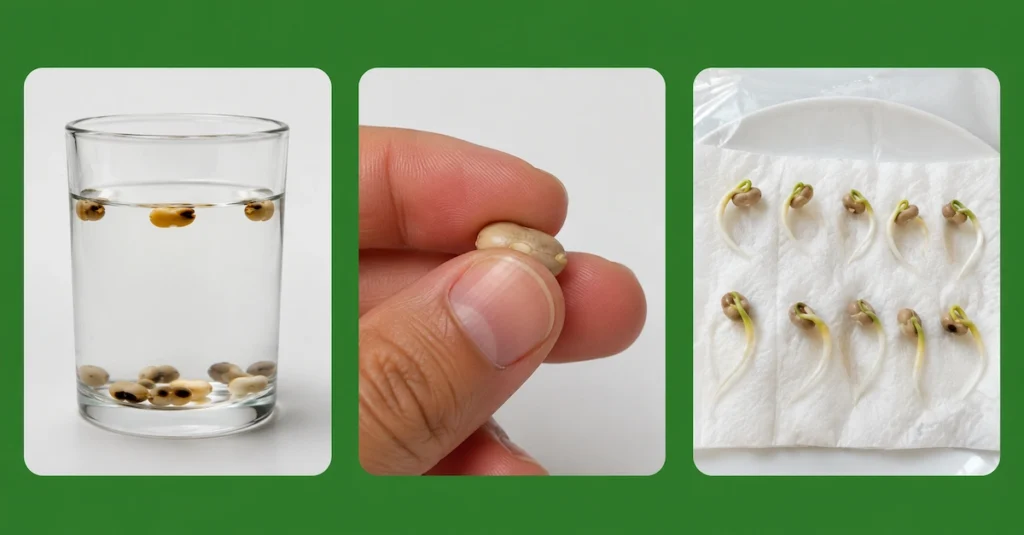
The Float Test (best for larger seeds — beans, peas, pumpkin, bottle gourd, okra)
Drop about 15–20 seeds into a glass of room-temperature water and let them sit for 10–15 minutes. Viable, well-filled seeds sink because they are dense with stored food reserves. Seeds that float are typically hollow, underdeveloped, or too old, and should be discarded. This test is not reliable for very small or naturally light seeds like lettuce or amaranth, so skip it for those.
The Squeeze Test (best for legumes and larger seeds)
Take a handful of soaked seeds after the float test and gently press each one between your fingernails. A healthy seed will feel firm and resist slightly before you can dent it. A seed that squishes, crumbles, or feels hollow and empty has no viable embryo inside worth planting.
The Paper Towel Germination Test (works for almost everything, and is the most reliable of the three)
This is the test I recommend to every gardener, beginner or experienced, before committing a full packet to soil.
- Take 10 seeds from the packet — a round number makes the percentage math easy.
- Dampen a paper towel or napkin with clean water until moist but not dripping.
- Spread the seeds out on one half of the towel, fold the other half over, and place it inside a loosely closed plastic bag or a plate covered lightly with cling film to retain humidity.
- Keep it somewhere warm and out of direct sun — around 22–28°C is ideal for most common vegetable and flower seeds, which fits comfortably indoors in most Indian homes outside of peak winter in the north.
- Check every day, keeping the towel moist but never waterlogged. Remove any seed that develops mould immediately so it doesn’t spread to healthy ones.
- Count how many seeds have sprouted a visible root or shoot after 5–10 days, depending on the crop — fast growers like radish and mustard show results in 3–5 days, while peppers and okra can take up to 10–14 days.
If 7 or more out of 10 sprout, that packet has strong, plantable germination and you can sow the rest with confidence. If only 4–6 sprouts, you can still use the packet, but sow more thickly than usual to compensate, and thin out the weaker seedlings later. If 3 or fewer sprout, do not waste soil, pots, or a growing season on the rest of that packet — return it if possible, or write off that batch and buy fresh.
Get this right and you avoid a frustrating pattern I see often — seeds that sprout just fine but then stall out at a couple of inches and never take off, usually because the seed stock was weaker than it looked.
Where You Buy From Changes Everything
In India specifically, seed quality varies enormously depending on the channel, and this is worth being honest about rather than repeating the vague “buy from a trusted source” line without explaining what that actually means in practice.
Krishi Vigyan Kendras (KVKs) and state horticulture department outlets are generally the most reliable and often the most affordable source for region-appropriate vegetable and flower seed, because the varieties stocked are usually selected for the local climate zone and tested under Indian conditions. The catch is limited variety choice and sometimes inconvenient timing tied to the official sowing calendar.
Established private seed companies with proper cold-chain packaging are a solid choice for hybrid vegetable seed in particular, where uniformity and disease resistance genuinely matter. Foil-lined, resealable packets are a good sign here — they protect against the humidity swings that damage seed viability fastest.
Local nursery loose seed sold by weight can be excellent if you know the nursery and they turn over stock quickly, but it is also where you will most often encounter the mixed-batch and old-stock issues described earlier. Always ask directly when the current stock was procured, and don’t be shy about doing the float or squeeze test right at the counter with a small pinch before buying in bulk.
Online marketplaces have made rare and micro-niche varieties far more accessible to Indian home gardeners than they were even five years ago, which is genuinely a good thing. The risk is inconsistent storage conditions during transit through hot warehouses, especially between March and June. If you order online during peak summer, check the packet for heat damage or condensation the moment it arrives, and run a germination test before you sow rather than assuming freshness from the listing photos.
Seed saved and shared informally between gardeners can be wonderful for open-pollinated and heirloom varieties, but viability depends entirely on how well the previous grower dried and stored it. Always test a sample first, and never assume shared seed is fresh just because it was given generously.
Open-Pollinated, Hybrid (F1), and Heirloom — Why This Distinction Actually Matters for Buying Decisions
This is where a lot of Indian home gardeners get confused while buying, so it’s worth being precise.
Hybrid (F1) seeds are bred by crossing two specific parent lines to combine traits like disease resistance, higher yield, or uniform fruit size. They are excellent for reliable results, especially for beginners, but you cannot save seed from an F1 hybrid plant expecting the same traits next season — the second generation will not breed true. If a packet says “Hybrid” or “F1” and you plan to save seed year after year, understand upfront that you will need to repurchase each season.
Open-pollinated (OP) varieties breed true from seed, meaning you can save seed from a healthy plant and expect similar results the following year, provided cross-pollination with a different variety hasn’t occurred. This makes OP seed genuinely valuable for gardeners who want to build a self-sustaining seed bank over time.
Heirloom varieties are a subset of open-pollinated seed with a documented history, often passed down regionally for generations — many Indian vegetable varieties, particularly local brinjal, chilli, and gourd types, fall into this category and are increasingly available through regional seed-saving networks and specialised sellers. These are exactly the kind of micro-niche, underrepresented topic worth growing if you’re gardening for the joy of variety rather than pure yield efficiency.
None of these three types is universally “better” quality — the quality checks in this article apply equally to all of them. What changes is what you should expect from the seed afterward.
A Note on Region and Season Before You Buy
Seed quality also has to be judged against whether the variety is even appropriate for your growing window and region, because a perfectly viable seed sown at the wrong time will still fail, and that failure gets wrongly blamed on “bad seed.”
Coastal and peninsular India (Chennai, Kochi, Mumbai) deal with high humidity through much of the year, which affects both seed storage at home and disease pressure after germination. North Indian plains face a sharper seasonal divide, with a narrow window for many summer vegetables before peak heat sets in around April, and another for winter crops after the monsoon recedes.
The Deccan plateau and hill regions have milder swings and generally more forgiving windows. When you’re buying, check the packet or ask the seller for the recommended sowing months for your specific zone rather than assuming a pan-India window — this single habit prevents a huge share of “the seeds just didn’t grow” complaints that are actually timing issues, not quality issues.
How to Store Seeds So Good Quality Doesn’t Go to Waste
Buying a genuinely good batch of seed and then storing it carelessly is one of the most common ways Indian home gardeners waste money without realising it. Heat and humidity — the two things Indian homes have in abundance for most of the year — are the fastest way to kill seed viability after purchase.
- Keep humidity out above everything else. A small silica gel sachet (the kind that comes inside shoe boxes and electronics packaging) dropped into an airtight container with your seed packets will noticeably extend shelf life. Replace or re-dry the sachet every few months.
- Use airtight glass jars or zip-lock bags, not the original paper envelope alone, especially once a packet has been opened. Paper breathes, and in a humid Indian climate that means your seed is absorbing ambient moisture every single day it sits on an open shelf.
- Store in the coolest, darkest spot available — the back of a kitchen cabinet away from the stove, a drawer away from a sunny window, or the vegetable drawer of a refrigerator for longer-term storage of seed you don’t plan to use this season. Avoid the freezer unless you know how to properly dry seed to near-zero moisture first, since freezing seed with residual moisture can rupture cell walls and kill the embryo.
- Label everything with the purchase or packing date the moment you bring it home. It takes ten seconds and prevents you from unknowingly sowing three-year-old seed thinking it’s fresh.
- Store different varieties separately, even within the same container, using small paper sachets inside the larger airtight box. This prevents any single infested or mouldy packet from contaminating your entire seed collection.
Common Mistakes Indian Home Gardeners Make While Buying Seed
Having gone through this process myself more times than I’d like to admit, these are the patterns I see repeated most often, and each one is completely avoidable once you know to watch for it.
Buying seed purely on packet photography rather than checking the actual printed details on the back — the photo is marketing, the fine print is information.
Stockpiling large quantities during a sale without checking the packing date, only to discover the “discount” seed was already a year old. Ignoring the recommended sowing season printed on the packet and blaming poor germination on the seed itself. Sowing an entire packet in one go on a brand-new, untested source instead of running a quick germination test on a small sample first.
Storing seed packets loosely in a kitchen drawer through the monsoon without any moisture protection. And buying loose seed from a source with no lot number or traceability, which leaves you with zero way to seek a replacement if the batch fails.
Your Quick Seed Quality Checklist
Keep this in mind the next time you’re standing at a nursery counter or about to click “buy” online.
Before buying:
- Variety name is specific, not generic
- Packing date and best-before date are both visible
- Lot or batch number is printed
- Germination percentage stated, or source is a certified/government-linked seller
- Packet feels sealed, dry, and untampered
- No visible mould, discolouration, or insect holes
- Seeds within the batch look uniform in size and colour
Before sowing the whole packet:
- Run a float test on larger seeds
- Run a 10-seed paper towel germination test if it’s a new source or older stock
- Confirm the sowing season matches your region’s current climate window
After buying, before storing:
- Transfer to an airtight container if the original packet is paper
- Add a silica gel sachet for humidity control
- Label with the date you acquired it
- Store away from heat, light, and moisture
Caring for Seeds After Germination Confirms They’re Good
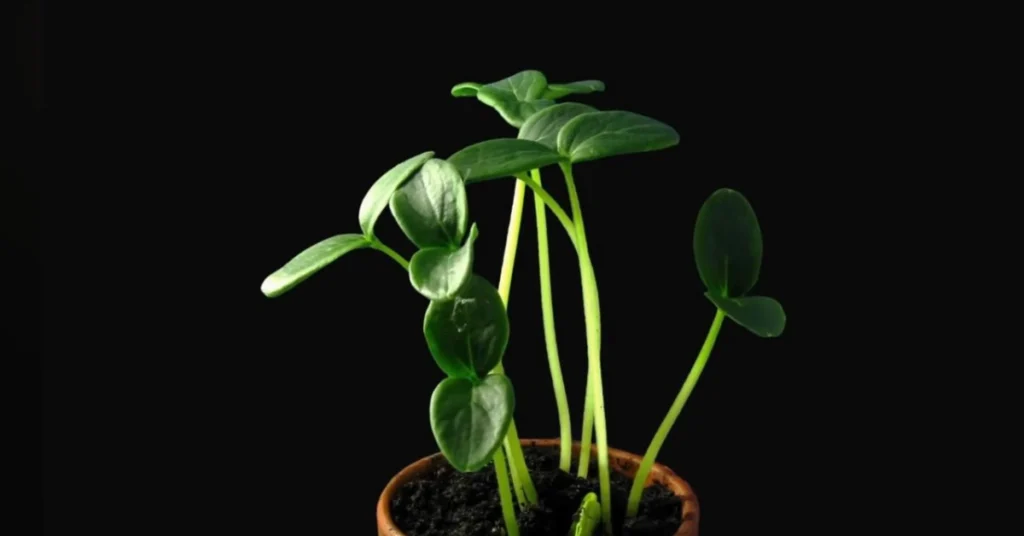
Once you’ve confirmed a batch is viable, a little post-germination care protects that good start. Keep newly sown trays or pots consistently moist but never waterlogged during the first week — inconsistent watering at this stage kills more good seedlings than bad seed ever does. Provide bright, indirect light immediately after sprouts emerge; leggy, pale seedlings are almost always a light problem, not a seed quality problem, and are frequently misdiagnosed as the latter.
Thin out overcrowded seedlings once true leaves appear rather than letting them compete for space and nutrients, and hold off on any fertiliser until the first true leaf set is fully open, since the seed’s own food reserve is generally sufficient until that point.
A Word on Seed Adulteration — A Real Problem, Not a Scare Tactic
It’s worth naming directly, because pretending it doesn’t happen doesn’t help anyone: seed adulteration and mislabelling is a documented issue in parts of India’s unorganised seed trade, particularly with loose seed sold by weight during peak sowing seasons when demand spikes and supply gets stretched thin.
The most common forms are old, unsold stock from a previous season blended in with fresh seed to move inventory, dead or non-viable seed of a similar size and colour mixed in as filler, and, less commonly, one variety’s seed passed off as a more expensive or in-demand one because the two look nearly identical to the untrained eye.
None of this should put you off buying loose seed altogether — plenty of local sellers are entirely honest and offer excellent value — but it’s exactly why the physical inspection habits and the small-batch germination test covered earlier in this guide matter more in India than they might in markets with tighter seed-trade regulation.
Treat every new source, even a recommended one, as unproven until your own test sample proves otherwise. It costs you ten seeds and five minutes; it saves you an entire season.
Final Thought
Good gardening outcomes are decided far earlier than most people realise — often before a single seed even touches soil.
Learning to physically inspect a seed, read what’s actually printed on an Indian seed packet, and run a five-minute germination test before committing an entire season to it is a small, unglamorous habit that quietly separates gardeners who get consistent results from gardeners who keep guessing.
Start applying even three or four of the checks in this guide the next time you buy seed, and you’ll notice the difference in your very first growing season.